Growing Basil

2014-06-01 15.10.56

For the first herb in the herb series I feel compelled to pick Basil.  It is easy to grow, packs a big punch, and generally is an approachable herb to both grow and use.  I have found however that most people do not have a clue as to how to grow basil and how to keep it up for a summer of use.  I cringe every time I hear someone say in May (or ever really) that their basil is already flowering, or that they were so excited to pick off one or two huge leaves from the bottom of the plant.  When you are growing herbs, it is always important to cut them so the plant is stronger from the harvest, not weaker.  With basil this is so easy to do and easy to mess up.

There are may varieties of basil, I have always stuck with the traditional sweet basil that is commonly found in Italian cooking.  The plant is fast growing, enjoys high heat and lots of water and sunlight.  Basil is also a bit finicky, if it starts to dry out the leaves will quickly start to wilt and droop (in the matter of a day or hours).  But don’t worry, it will respond quickly to a good watering.  If you don’t get a lot of sunlight, or notice the temperature dropping too sharply at night time you may want to change the location of your plant or bring it in for night time early in the season.  Basil is actually a tropical plant, so northern cold temperatures and shade are not going to result in much bounty.

2014-05-25 19.10.44

Believe it or not this top picture is my basil about a week after planting.  I put them outside and the wind and cold really wilted and damaged the plants.  I had to stake them up to keep them from drooping all the way over.  With careful watering, protection from the high winds, and sunlight they turned into the picture below in just 2 more weeks.

2014-06-01 14.02.29

Some ways to retain moisture without opening the door to fungus or mold (which basil can be prone to) are to put a layer of mulch around your plants and be sure to not over crowd the plants when you have several in a pot.  It’s also important to water at the base of the plant, don’t get the leaves all wet.  On a hot sunny day the water on basil leaves can actually damage the fragile leaves.

2014-06-01 14.03.05

When it comes to picking your basil for use, be sure to avoid picking the biggest yummiest looking leaves from the bottom of the plant.  Those leaves are the primary solar panels that are powering your plant.  If you pull them off you risk losing the entire plant, especially if it is young.  You always want to pick by pinching off from the top 1 to 2 inches of growth just above a split.  You will find that once you do this, you will get two big shoots out of the joint you picked above and essentially will double the growth.  When this grows up high enough you can do the same thing to this new growth…this is how you get a basil plant that is 1-2 feet high and bushy.

2013-08-26 19.37.14

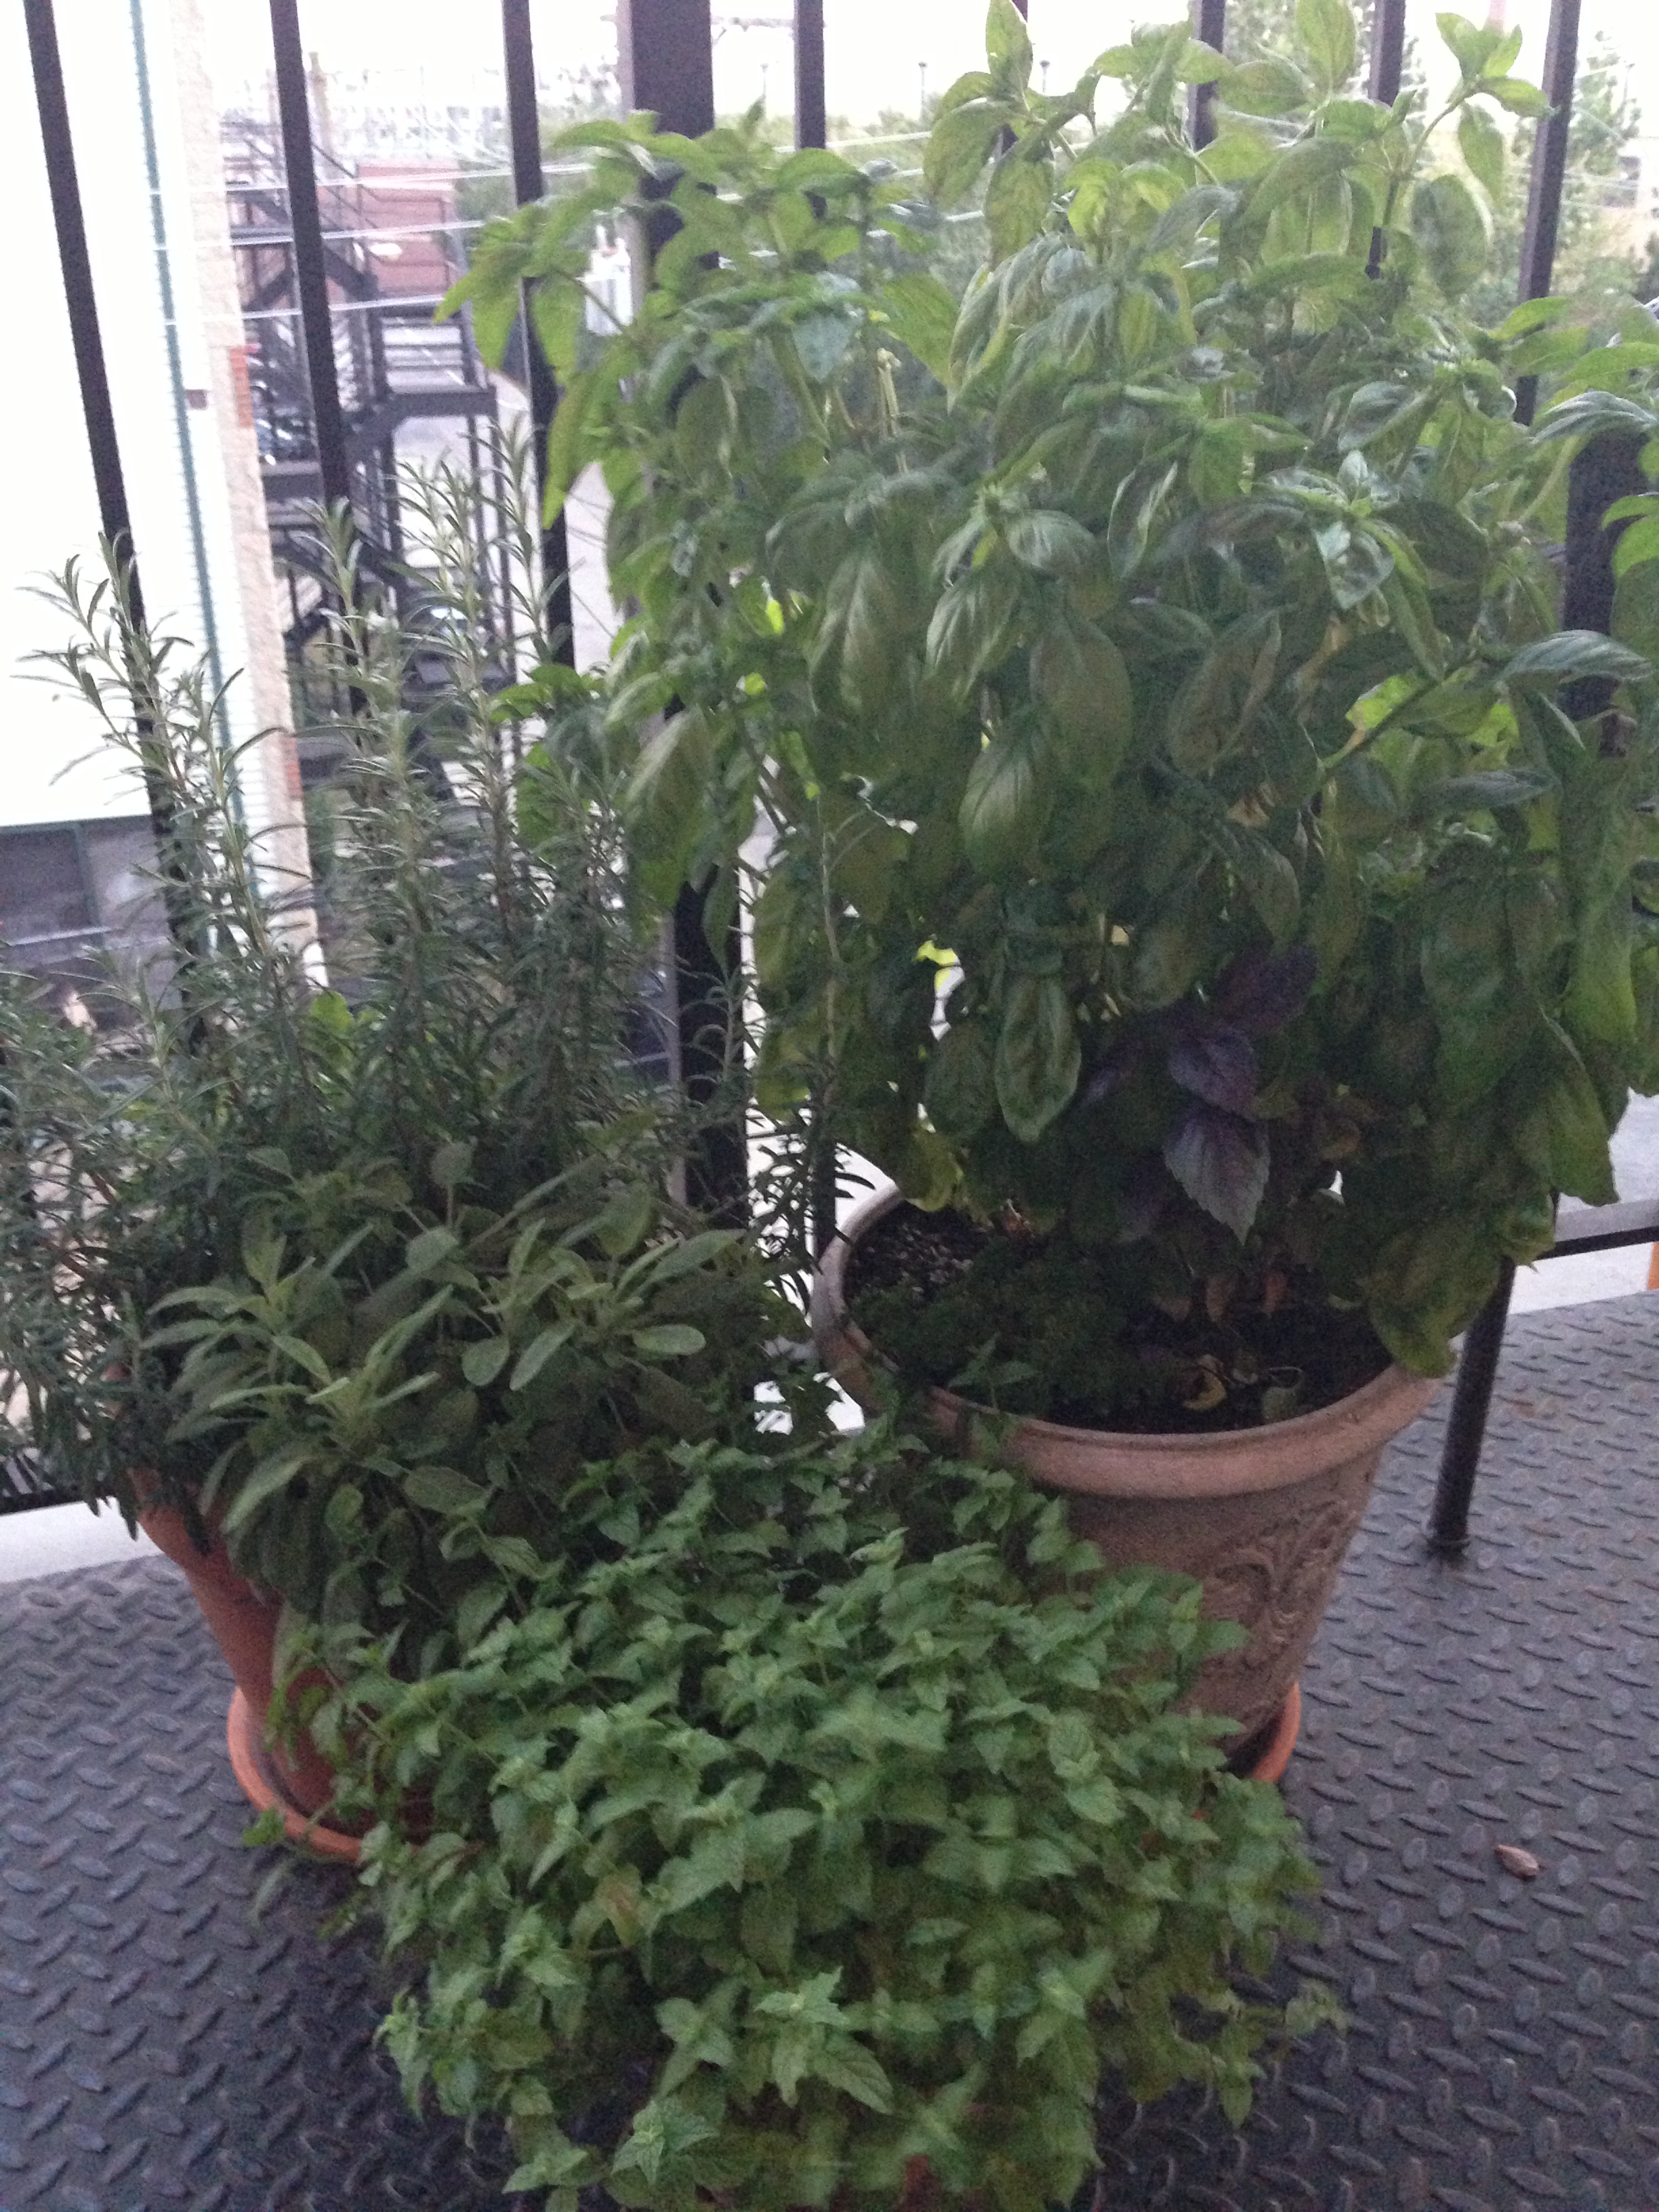
My basil plant from last year at the end of the season

If your plants starts to flower on the top it is “going to seed” or “bolting”.  You want to stop this, as this is your plant getting ready to shut itself down and prepare for next year.  The rest of the leaves will get bitter tasting, and lose that magical sweet quality.  You need to get ahead of the flowering by pinching off the plant a few inches below where the flowering started.  The more you use basil the more energy it will put into making delicious leaves for you to use, which is what you want.

As I mentioned in the last post, make sure you fertilize your soil however you feel most comfortable to keep the soil in the pot nutrient rich.  Yellow and flavorless leaves are often a sign that you need more nitrogen in the soil, which you can replenish regularly with fertilizer.

Now that you have a beautiful and healthy basil plant, you can start putting it to work in the kitchen.  Basil is extremely versatile, you can add it to salad, smoothies, cocktails, sauces, pizza, fish, poultry, the list goes on and on.  You can dry it, freeze it, or make it into a pesto when you start to have too much.  I can’t wait to start sharing more recipes with basil over the summer.

2013-08-18 18.41.51

Check out some of my previous recipes that involve fresh basil:

Pestohttps://seasonsforcooking.com/2013/09/14/end-of-summer-pesto

Basil, Lemon, and Jalapeno Pestohttps://seasonsforcooking.com/2013/09/05/basil-lemon-and-jalapeno-pesto

Coconut, Strawberry, and Basil Smoothiehttps://seasonsforcooking.com/2014/01/04/coconut-strawberry-and-basil-smoothie

Mango and Mint Smoothiehttps://seasonsforcooking.com/2013/09/22/mango-mint-smoothie

Whole Trout Dinnerhttps://seasonsforcooking.com/2013/08/26/whole-trout-dinner

Spinach French Toast with Tomato Topping  – https://seasonsforcooking.com/2014/04/08/spinach-french-toast-with-tomato-topping

Light Spinach and Artichoke Diphttps://seasonsforcooking.com/2013/10/26/light-spinach-and-artichoke-dip

Spicy Spaghetti Sauce with Turkey Meatballshttps://seasonsforcooking.com/2013/10/11/spicy-spaghetti-sauce-with-turkey-meatballs

Meaty Lasagnahttps://seasonsforcooking.com/2013/09/18/meaty-lasagna

 Enjoy and Cook Well!

How to: Planting your Herb Garden

2013-04-28 15.01.39 If you haven’t already noticed I love using fresh herbs in my cooking.  The flavor is unbeatable and takes your home made dishes to a whole new level.  With summer around the corner fresh flavors are what we are all craving.  Why not spice up your meals with a sprinkle of chives, basil, thyme or mint?  This is my first installment of what will hopefully turn out to be a fruitful series on home grown herbs.  How to grow, harvest, and use these potent plants to enhance your cooking and way of thinking.  Keep in mind this is based on my experiences, I am by no means a botanist or herbalist.

2013-08-11 14.25.34

If you are buying herbs from the store you know how quickly they expire and how expensive this becomes over time.  Growing your own herbs is a great way to keep an endless supply at your disposal.  We don’t have much outside space, but I utilize every bit that is there to grow a small selection of my favorite herbs.  If you don’t have outdoor space to let your herbs grow, try
growing indoors along a window where you get a fair amount of sunlight.

2013-04-29 11.53.41A few shots of our balcony herbs last year.


I have to grow my herbs in pots as our outdoor space is a metal balcony, 4 stories off the ground.  When I think about it this is actually an ideal arrangement (or at least that is what I tell myself) for several reasons.  First, I can easily move my herbs indoors when the weather gets cold to maintain and use for the winter.  Second, most herbs are actually weeds and spread like wildfire.  When they are contained in a pot, you can keep control of growth.  Last but not least, I can move the pots around to redesign our outdoor space easily.

What to do and know:

Once you decide on the herbs you want and get your starter plants home, you need to pick out a good pot.  Beyond basic aesthetics you want to have a pot that has a hole in the bottom to allow excess water to drain.  If the water can’t drain from the pot you run the risk of the roots being too wet and molding = yellow dying plant.  Keeping a plate under the pot will keep it from making a mess when you water.  I use a few different styles of pots, but always go back to the trusty and cheap clay pots pictured below.  Make sure the pot is big enough as well, you want the roots to have room to grow as your plant grows.  I try to pick a pot that will be about as large as the plant itself when it is full grown.  Bigger is better.

2014-05-25 19.00.06

Prepare your pot by putting a few rocks on the bottom to assist with water drainage and to keep the soil from falling through that nice hole in the bottom.

2014-05-25 19.00.26

Now for the soil.  I use a standard potting soil that comes with fertilizer that claims to feed the plants for up to 9 months.  This is where people get creative.  I have heard of mixing in egg shells into the soil, peat moss, news paper, vegetable peelings, coffee grounds, the list goes on and on.  I can see the merit in this, but to be honest I’m not that intense.

Fill your pot 3/4 of the way full with soil, take your starter plant out of the tray and make a little hole large enough for the bulb.  A little trick I learned is to breakup or unwind the roots after you pull it out of the tray.  The idea here is that the roots in the tray are typically wrapping around in a circular motion that if not broken from this growth pattern can eventually strangle the plant as the roots continue to grow in this direction.  You want the roots to spread out into the new space you are providing, so loosen them up to let that happen.

2014-05-25 19.11.17

With your new plant in the pot, fill in any spaces left with soil making sure to leave a little space between the top of the soil line and the top of the pot.  You will appreciate this extra space when you water.  Gently pat the soil down, be careful not to pack to hard.

Now you want to water, water, water your new plant to let it settle and start to grow!

A few basic tips on providing the best care to your little baby plants:

1.You have to water them pretty much daily (I water first thing in the morning).  The reason is that these pots are of a confined space so there is only so much soil and so much saturation.  Growing plants need a lot of water to not only survive, but thrive.  You don’t have to worry about over watering, as the excess water will run out the bottom.  Keep in mind these pots will get hot in the sun and water in the soil will readily evaporate further depleting your roots from water.  On hot days, you will want to consider watering twice a day.  I know, needy little suckers.

2. Fertilize your plants with some sort of supplement, I use miracle grow powder that I add to the water every two weeks.  You want to keep the soil nutrient rich to give your plants what they need to stay healthy.  Yellowing leaves or loss of vibrant color is typically a sign that you need to fertilize.

3. Use your herbs!  When you cut your herbs back for use they come back two fold with new growth and you keep maturation at bay so the plant doesn’t go to seed.  With most herbs, there is a right and wrong way to harvest them…we will cover this further as the herb series continues.

What am I growing so far this summer you may ask, well let me tell you:

-Chives
-Basil
-Mint
-Lemon Balm
-Rosemary
-Thyme
-Lemon Thyme
-Curly Parsley
-Sage

The summer is just starting and I’m sure I’ll find a few more plants I want to have around, like tarragon and oregano…if only I can find the space!  Let me know what you have growing!

Enjoy!

Pine Cones

2013-10-13 13.50.18

On a recent trip up to Wisconsin I collected a large number of pine cones from the woods around the cottage.  Before bringing them inside the house a very important step to take is de-bugging the cones!  Pine cones are a nice home for little bugs that can then run wild in your home.  De-bugging your pine cones is easy and there are several ways to go about it.  I used a soaking method instead of baking them in the oven, I just imagined the gas oven catching the pine cones on fire and burning down the entire condo building…you’re welcome neighbors.

What you will need:

– 1 large bucket

– 2-3 gallons of warm water

– 1 cup of household ammonia (I’ve seen vinegar be used before, if you don’t want to use ammonia)

– Newspaper

– Large plastic bin to hold cones for drying

– Pine cones

2013-10-07 17.17.38

Directions:

1. Start by putting 1 cup of household ammonia into the large bucket and filling 1/2 way with at least 2 gallons of warm water.

2. Pull out needles and dirt as able before putting all the pine cones into the ammonia water, fill up as needed with warm water to cover the cones.

3. The cones will float, so make sure to mix up occasionally or use a heavy bucket on top to submerge cones as able.

2013-10-07 17.37.30

4. Allow the cones to soak for about an hour, then rinse well with water.

5. Next you want to lay the cones out in the large plastic bin lined with newspaper.  I brought the cones inside at this point to dry, otherwise I was afraid they would get new bugs in them while drying outside.

2013-10-07 18.50.11The cool thing about pine cones is that they close up when they are wet then open back up when they are dry.  So when you are picking pine cones don’t be afraid to grab the ones that aren’t open, they will open up once they are clean and dry.  I found a bunch of really little pine cones that I’m excited to use in a small centerpiece or two this winter.

Variations: 

-White Cones- you can soak in bleach water instead of ammonia water, you need to let them soak longer (like 8-10 hours) before rinsing.

– Shiney Cones- after de-bugging spraying with a clear polyurethane spray and let dry as recommended on spray can.

– Glitter Cones- after de-bugging you can decorate the cones with glue and glitter, a fun craft project for little kiddos!

Gourd Centerpiece

Entertaining is about more than just the company, just the food, or just the celebratory event itself.  As I get older and have friends over for dinner or host a party, I try to make it more of a special event rather than a last minute occasion.  To truly entertain I like to go above and beyond to pull everything together.  The drinks should enhance what you are serving, music and lighting can set the mood, appropriate serving ware and food presentations make everyone feel special.  Decor doesn’t need to be anything grandiose, a little bit can go a long way.  I like to have fresh flowers around the house to bring a little more to the table (literally), but come Fall flowers are not as vibrant as they were throughout the spring and summer.

2013-09-20 18.28.42

I saw a picture of a centerpiece consisting of a hurricane with 3 little pumpkins in it and I thought it was so cute and festive for Fall.   So I took it a step further and bought a basket full of gourds to fill up the tall flower vase on our buffet.  Picking out the gourds was the best part, there are so many shapes, colors, and sizes.  To give it more height I added some willow branches I got from the grocery store.  I think it turned out pretty nice and it could not have been easier.  As long as I don’t get bored with it, I plan to keep it out all the way through Thanksgiving!

2013-09-20 18.31.52As the weekend approaches, hopefully you will be inspired to add a little taste of fall to your home…even if it’s just for you to enjoy.