Coconut and Roasted Red Pepper Sauce

2013-11-24 18.50.28

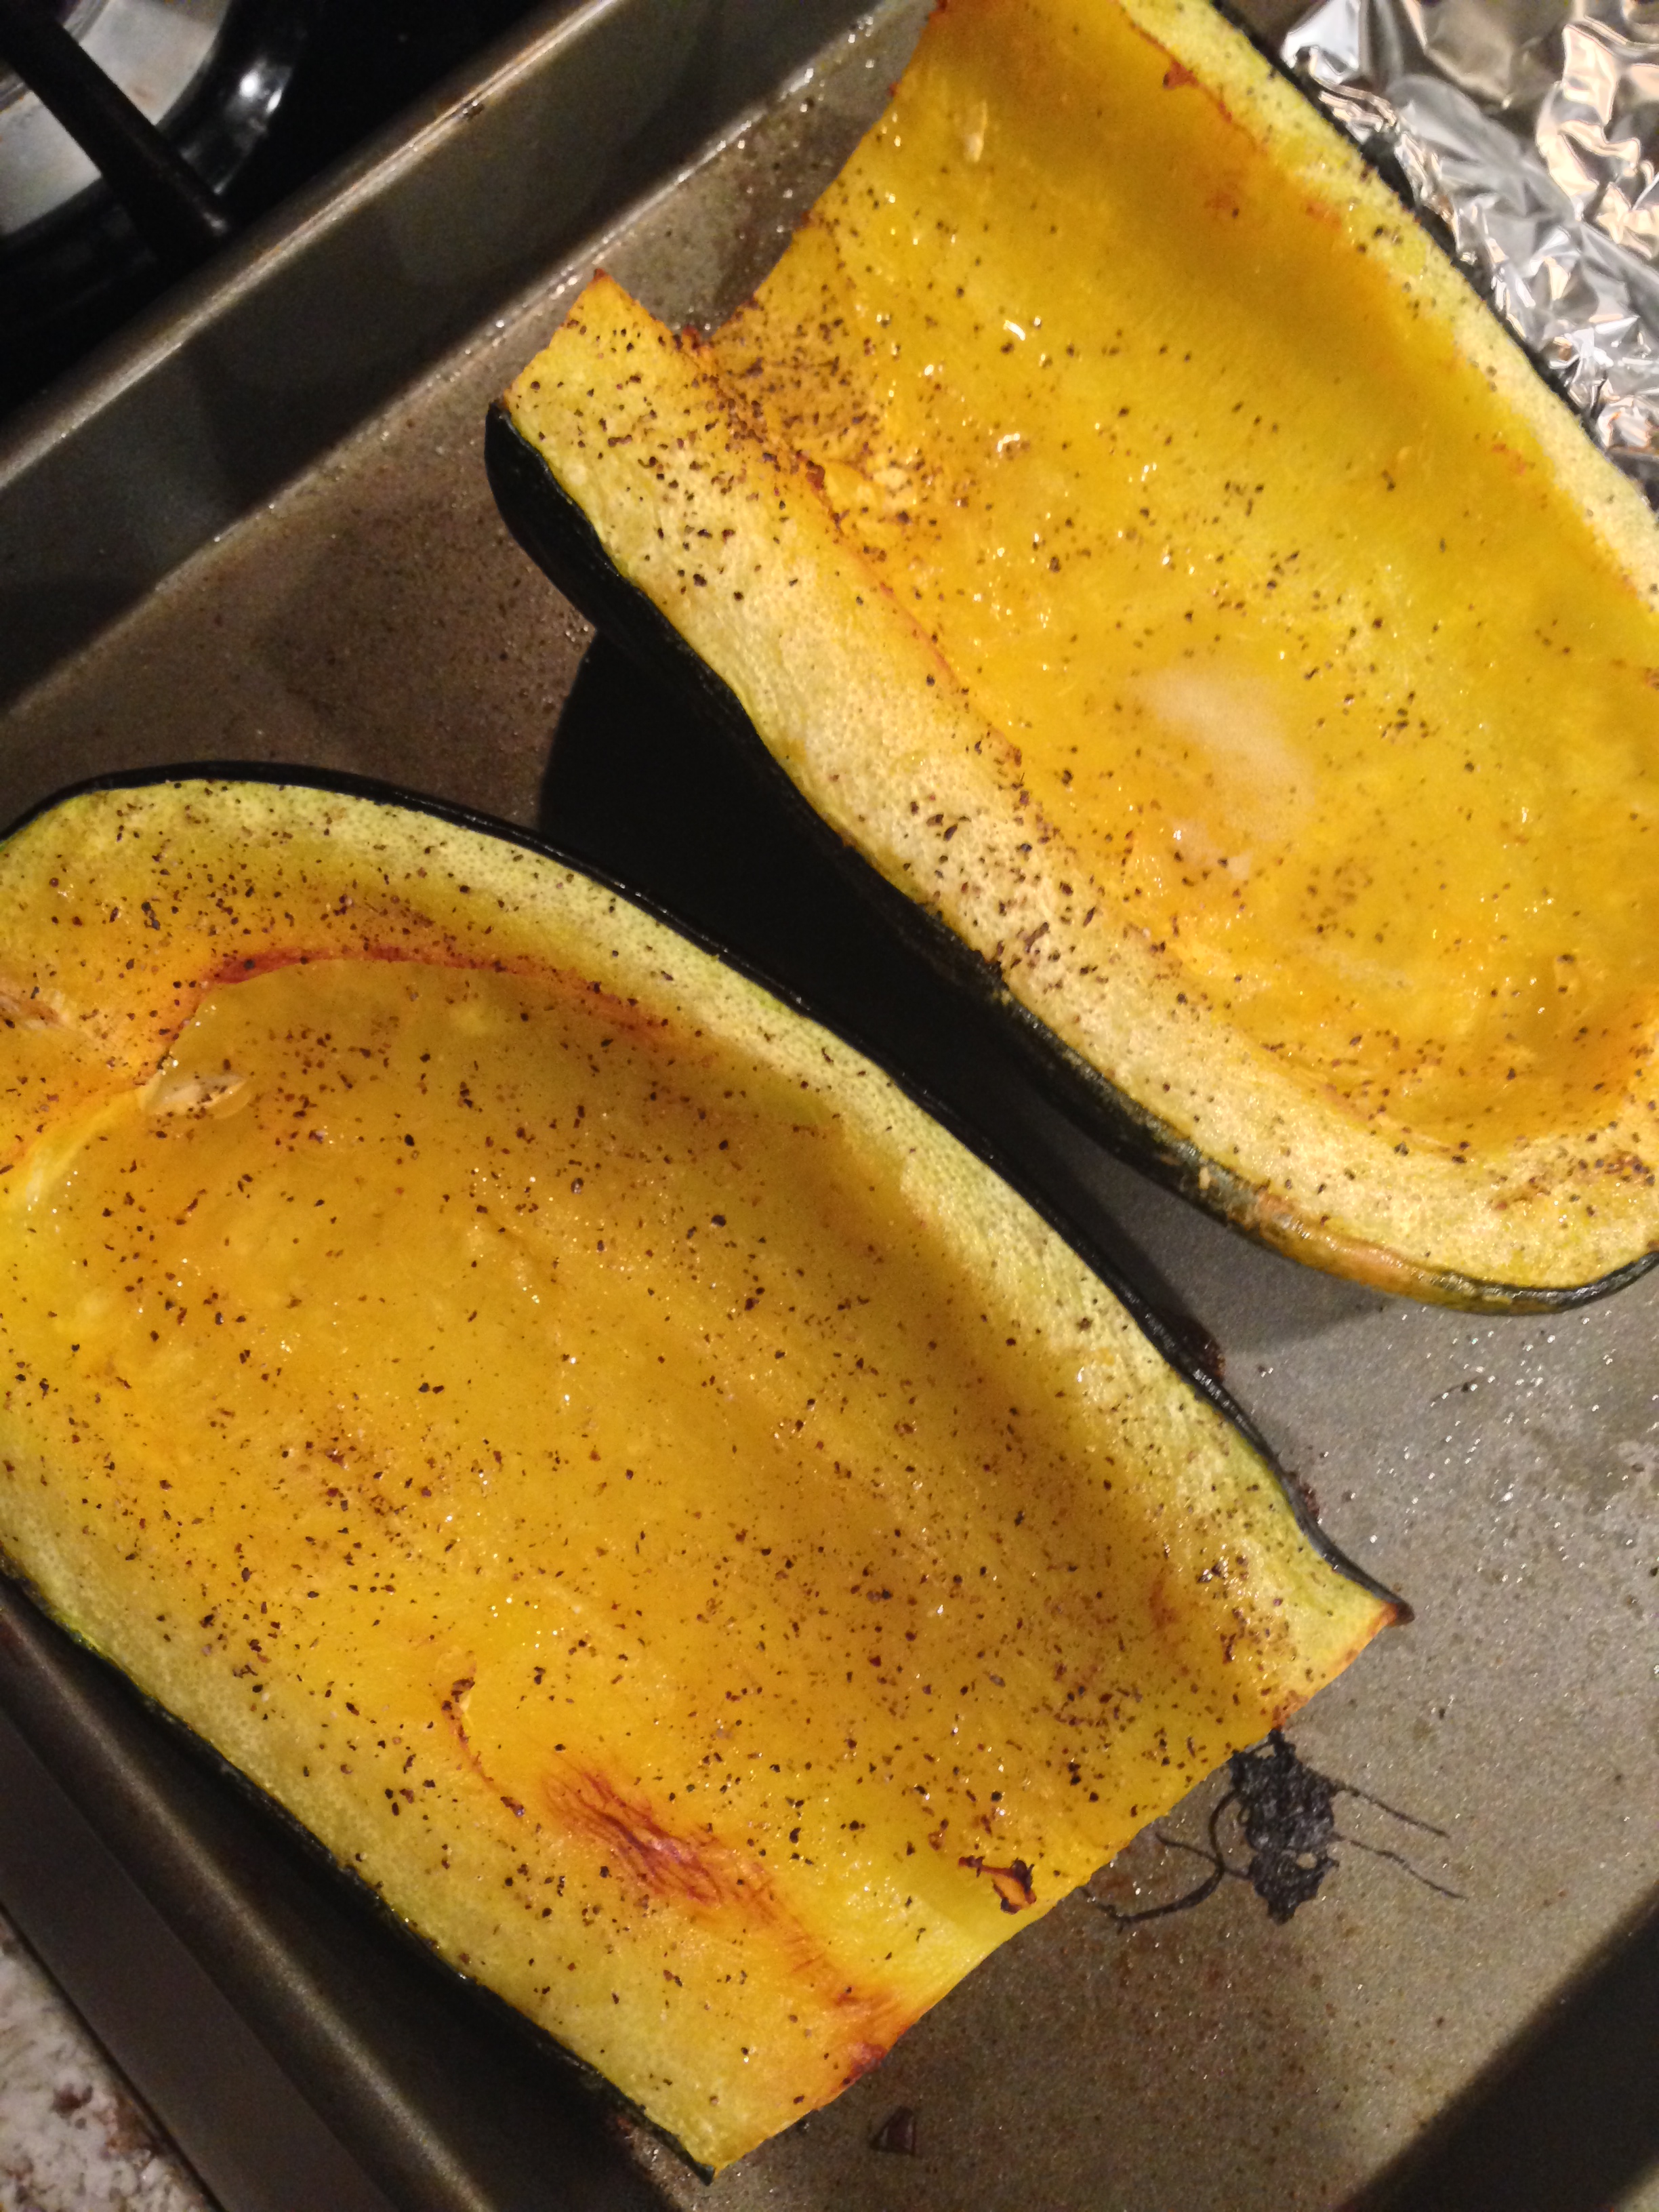
After Thanksgiving you are likely looking for something to eat that is healthy but perhaps with flavors that are out of the comfort food category.  This dish is full of vegetables and has a spicy flavor that is perfect for this time of year.  Serving on a bed of spaghetti squash cuts back on calories and sneaks in some extra fiber.  I made this dish with coconut milk to keep it dairy free and change the flavor profile even further out of the comfort food zone.  I used chicken, but this would be good with pork or even shrimp.

Ingredients: 

1 Onion, diced
1 tsp coriander powder
1/2 tsp cayenne powder
1 Tbsp fresh ginger, minced
4 cloves of garlic, minced
1 Tbsp sriracha (or red pepper paste)
1 15oz can of diced tomatoes
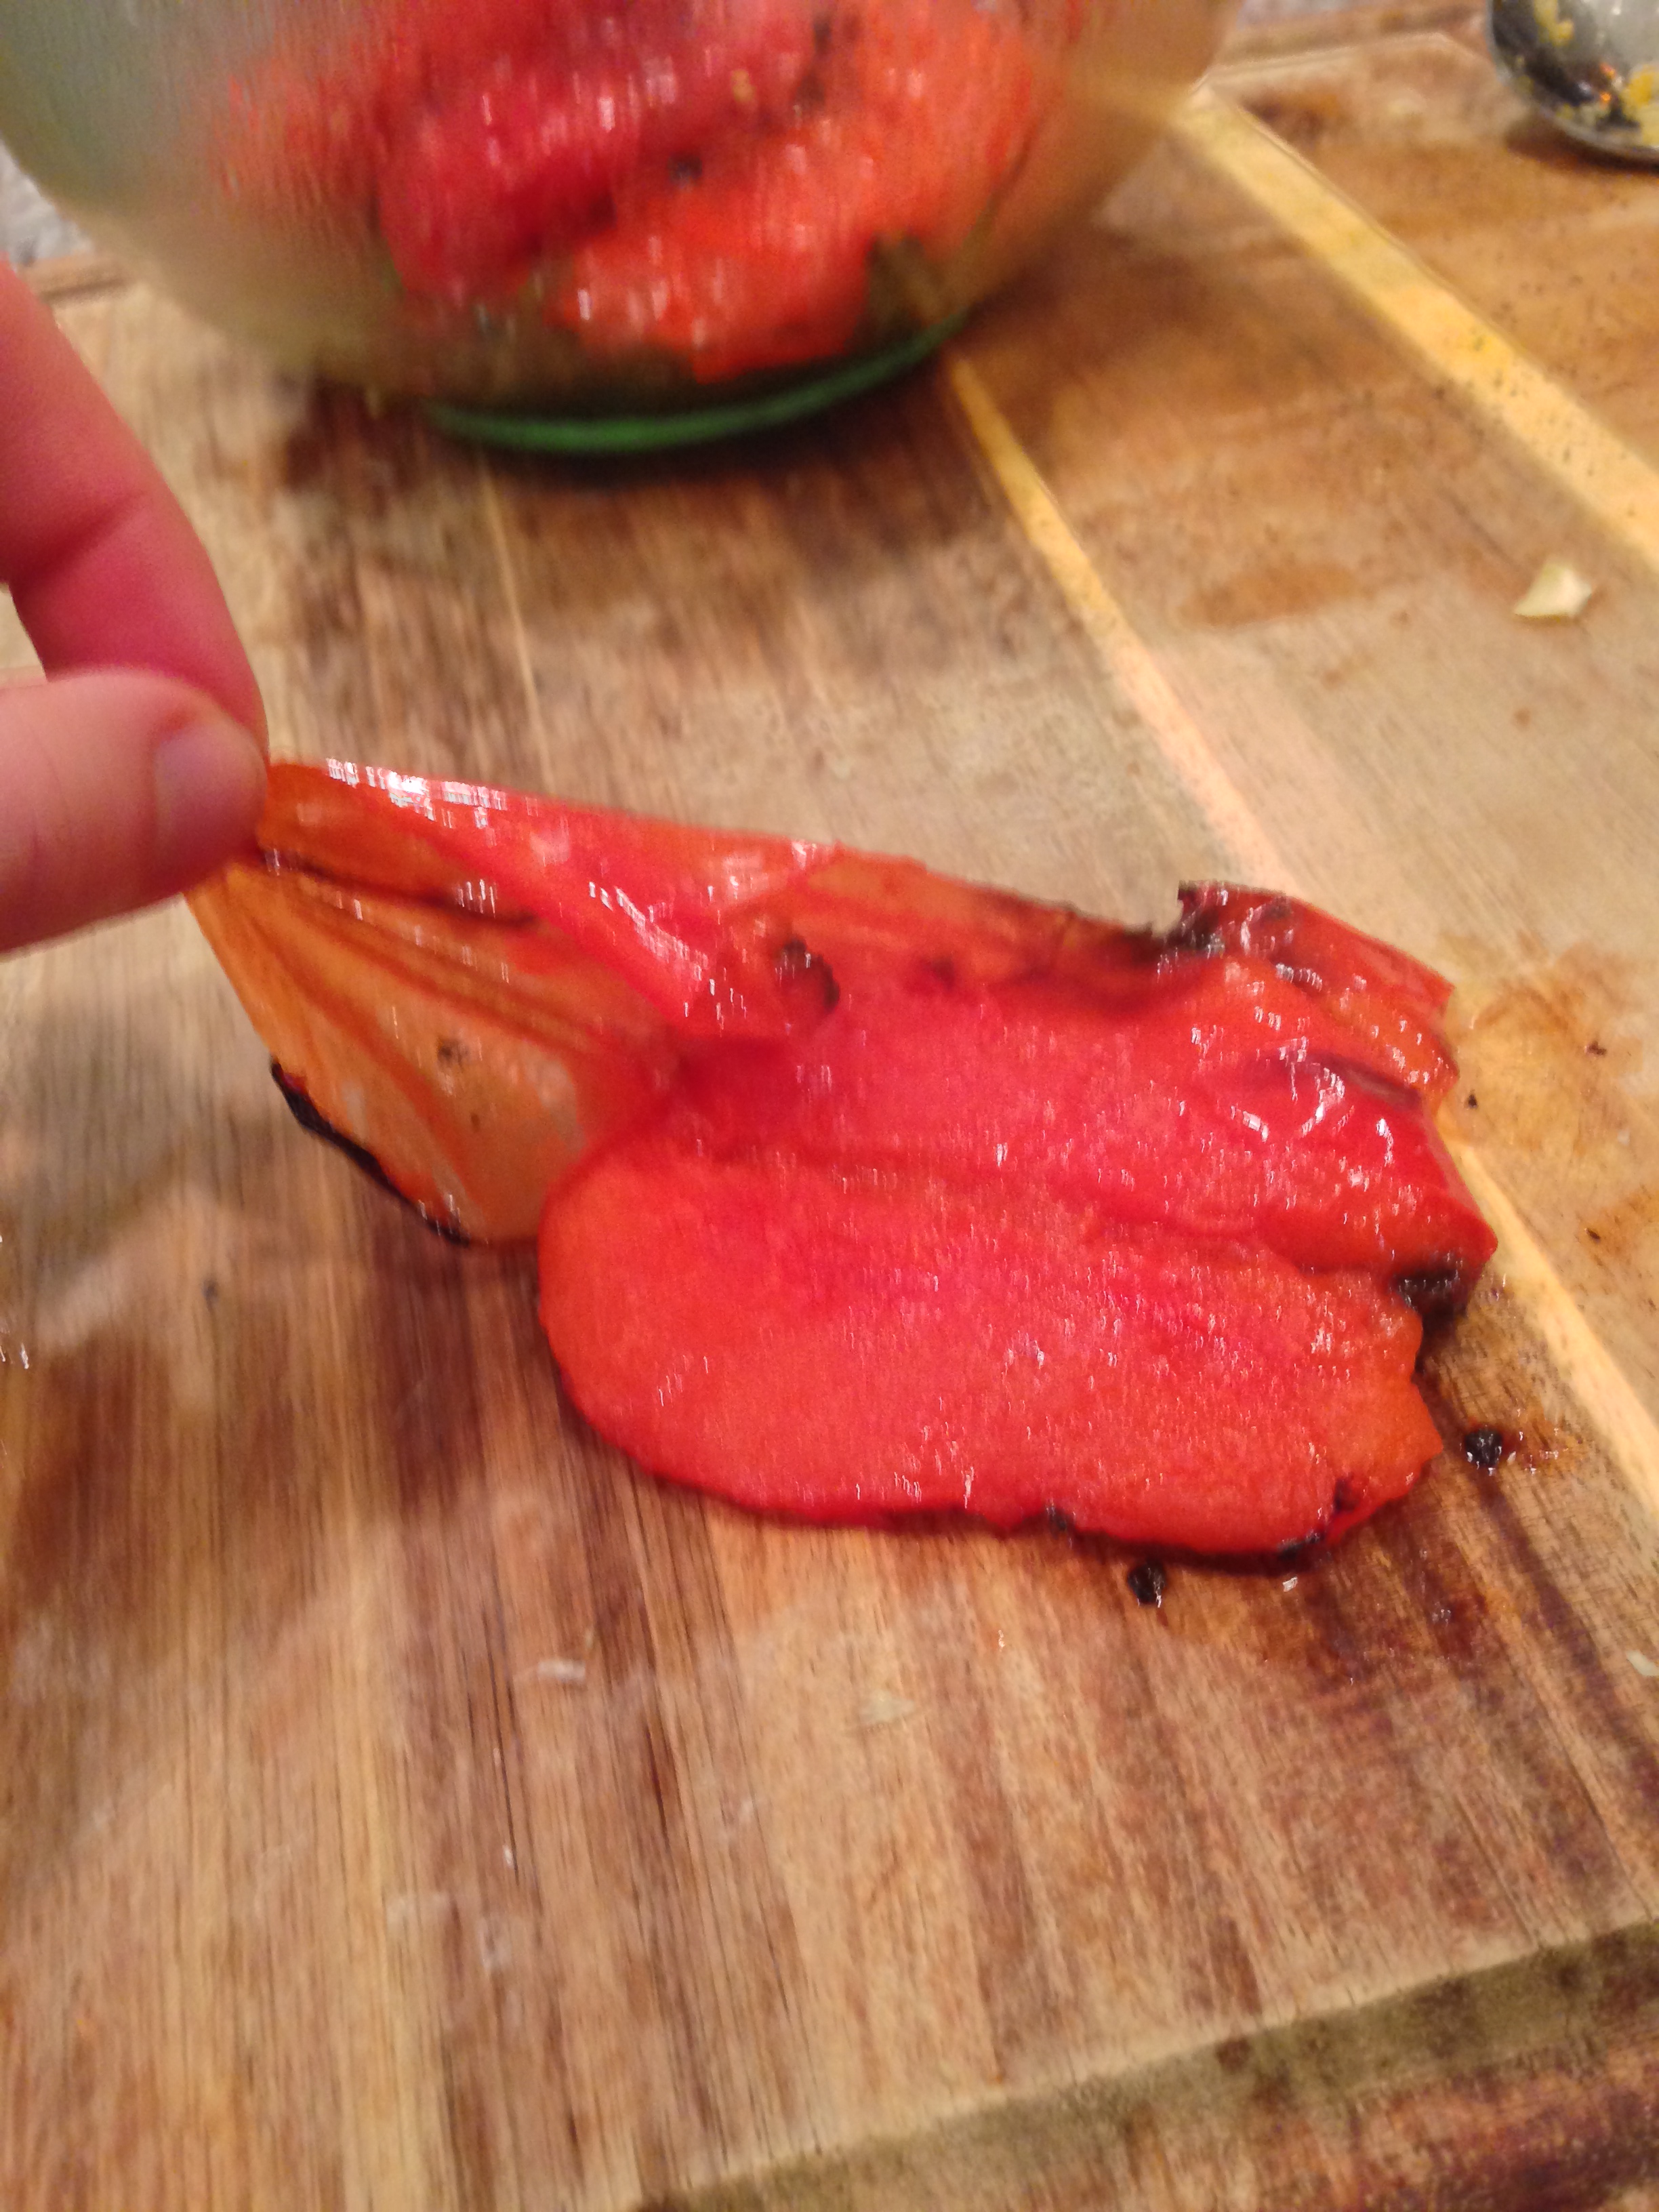
3 red peppers, roasted with skins removed
1 jalapeno, roasted
1 15oz can of coconut milk
1 tsp truvia or sugar

Directions:

1. Slice red peppers and jalapeno into flat pieces, spray with olive oil and roast for 15-20 minutes at 425 degrees.

2013-11-24 17.58.26

2. While the peppers are roasting heat grapeseed oil, coconut oil, or olive oil in large dutch oven, saute onions over medium heat for 5 minutes.

3. Add coriander and cayenne, simmer for 1-2 minutes until fragrant.  Stir in garlic and ginger, continue to heat for 5 minutes.

4. Add can of diced tomatoes including juices and mix well.

5. When the peppers are blackened, remove from oven and place in bowl covered with saran wrap.  Allow to sit in bowl for at least 5-10 minutes before removing skins (sitting in steam will allow skins to slide off easily).

2013-11-24 18.02.40

6. Roughly chop peppers and add to pan.  Add sriracha and truvia or sugar and allow to simmer for 5 minutes.

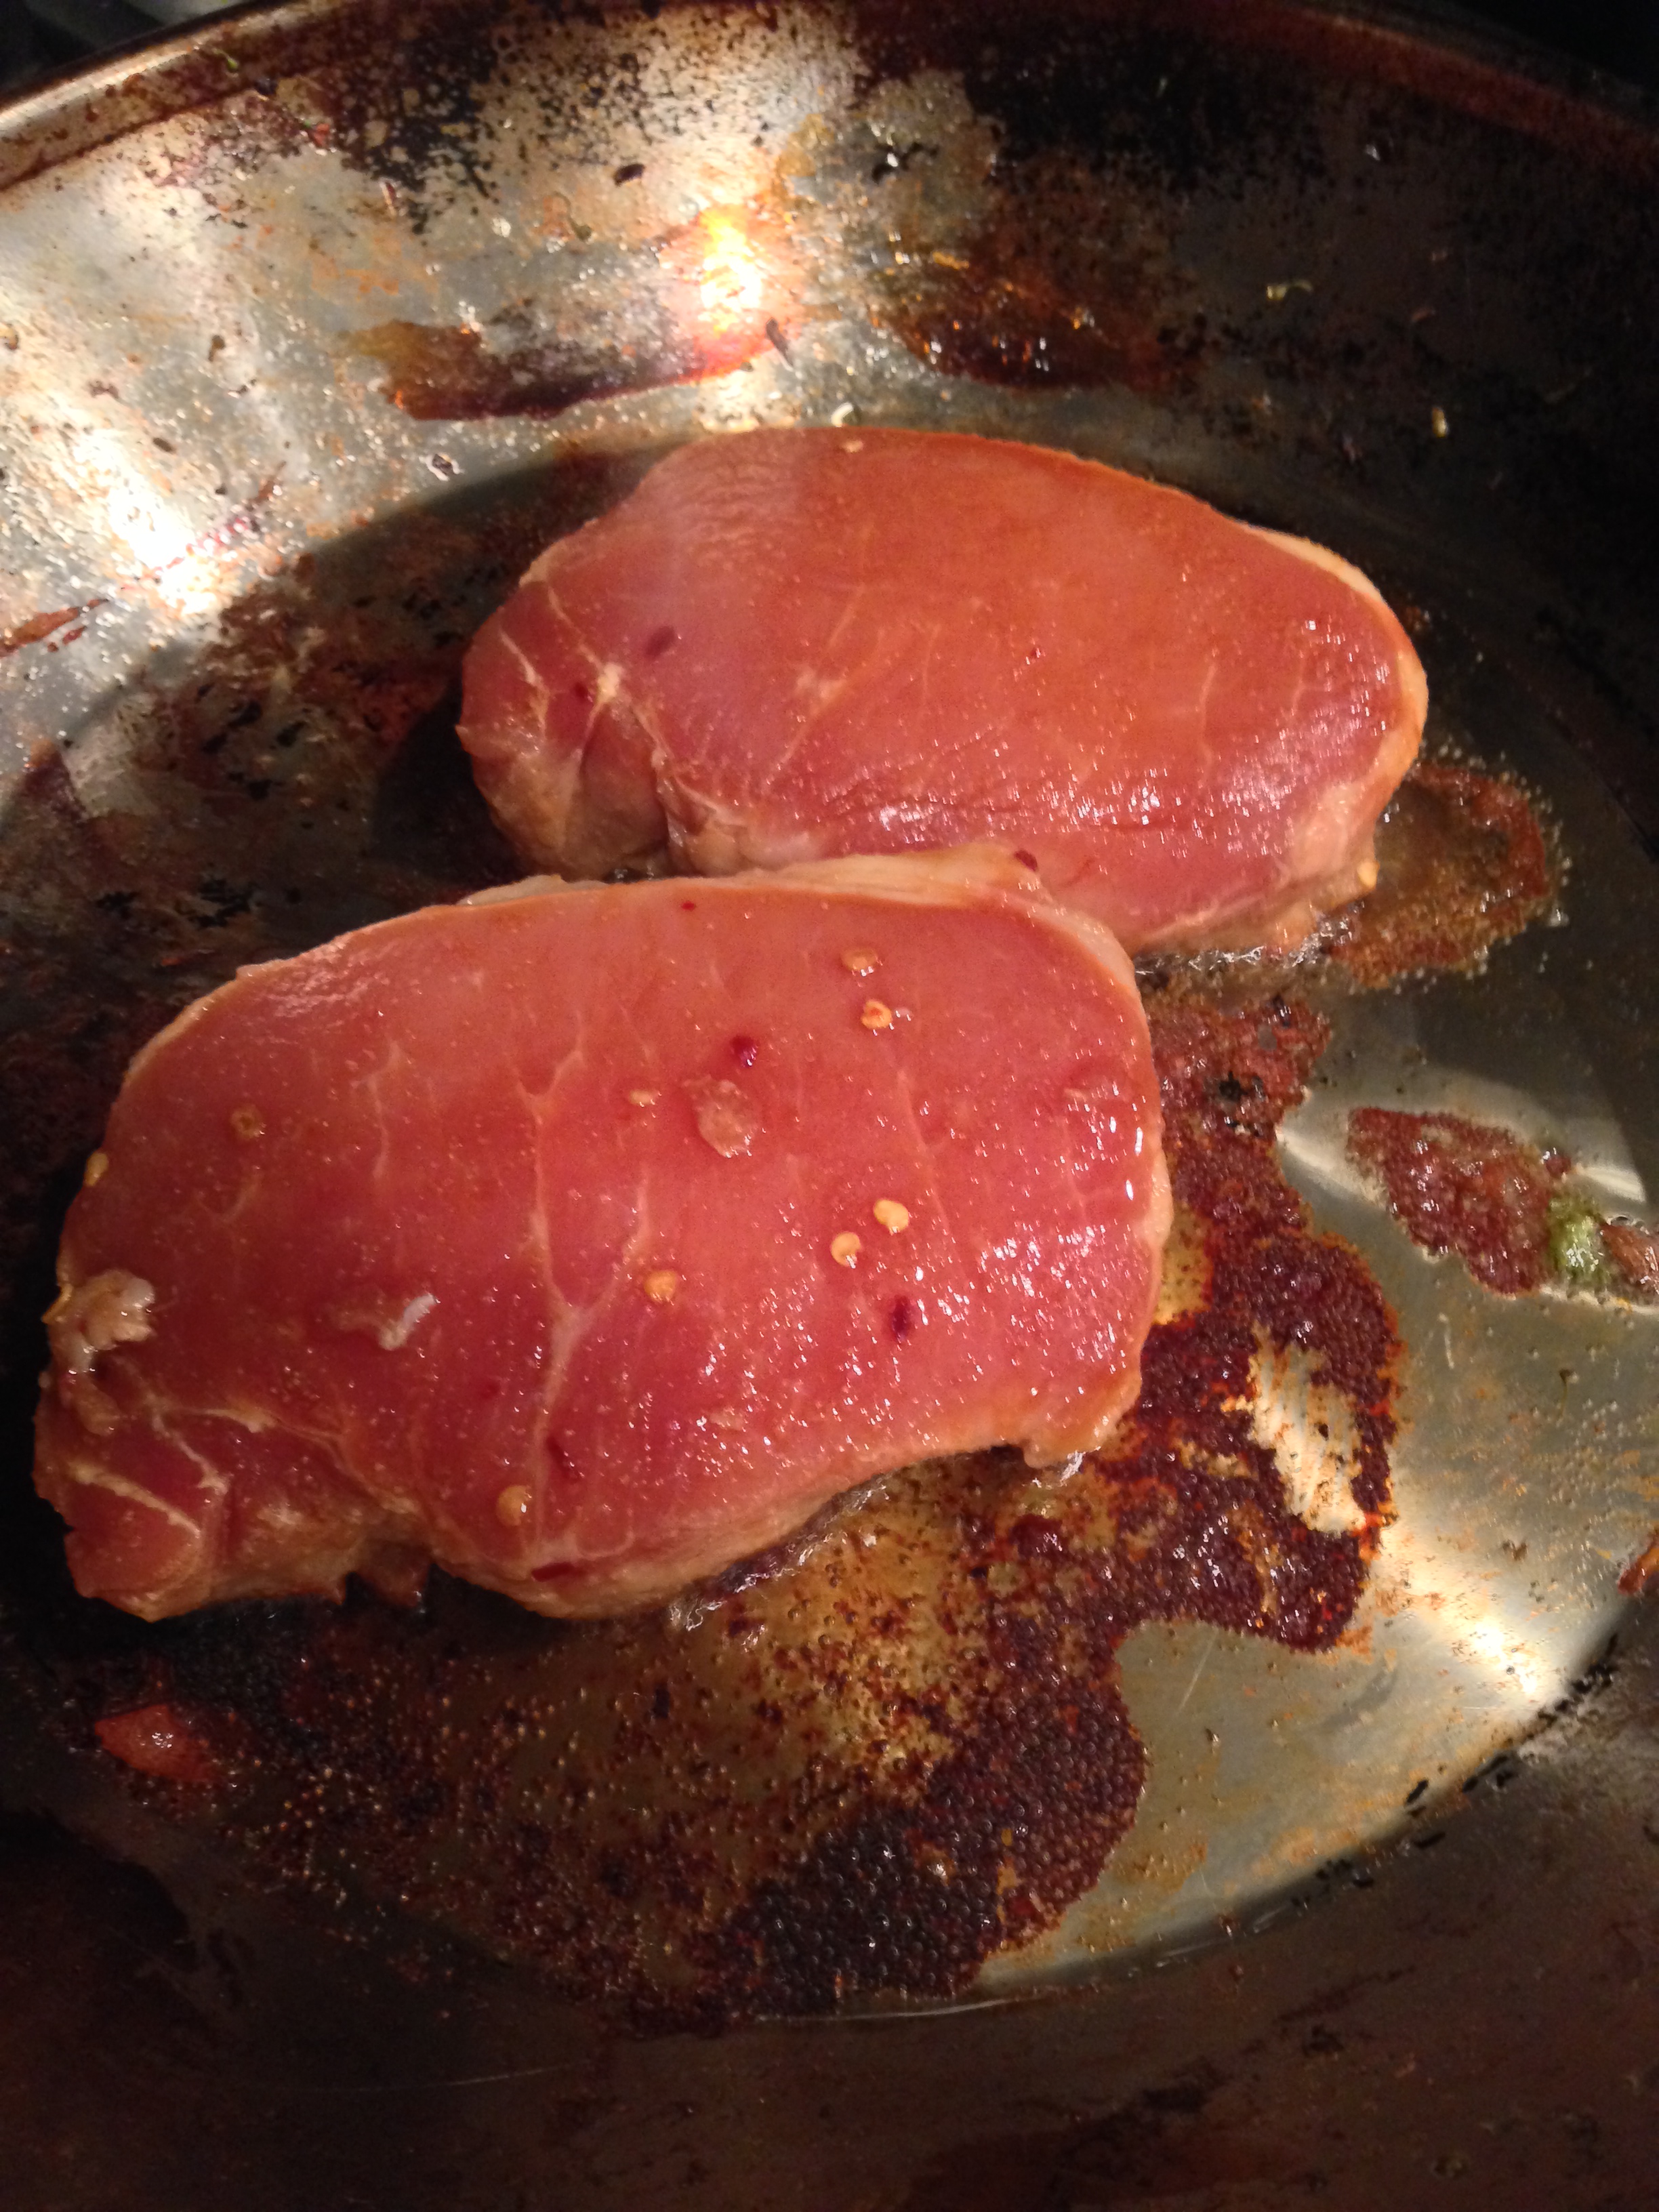
7. While your sauce is simmering start to brown chicken (seasoned lightly with salt and pepper) in heavy skillet for 5 minutes on each side.

2013-11-24 18.10.29

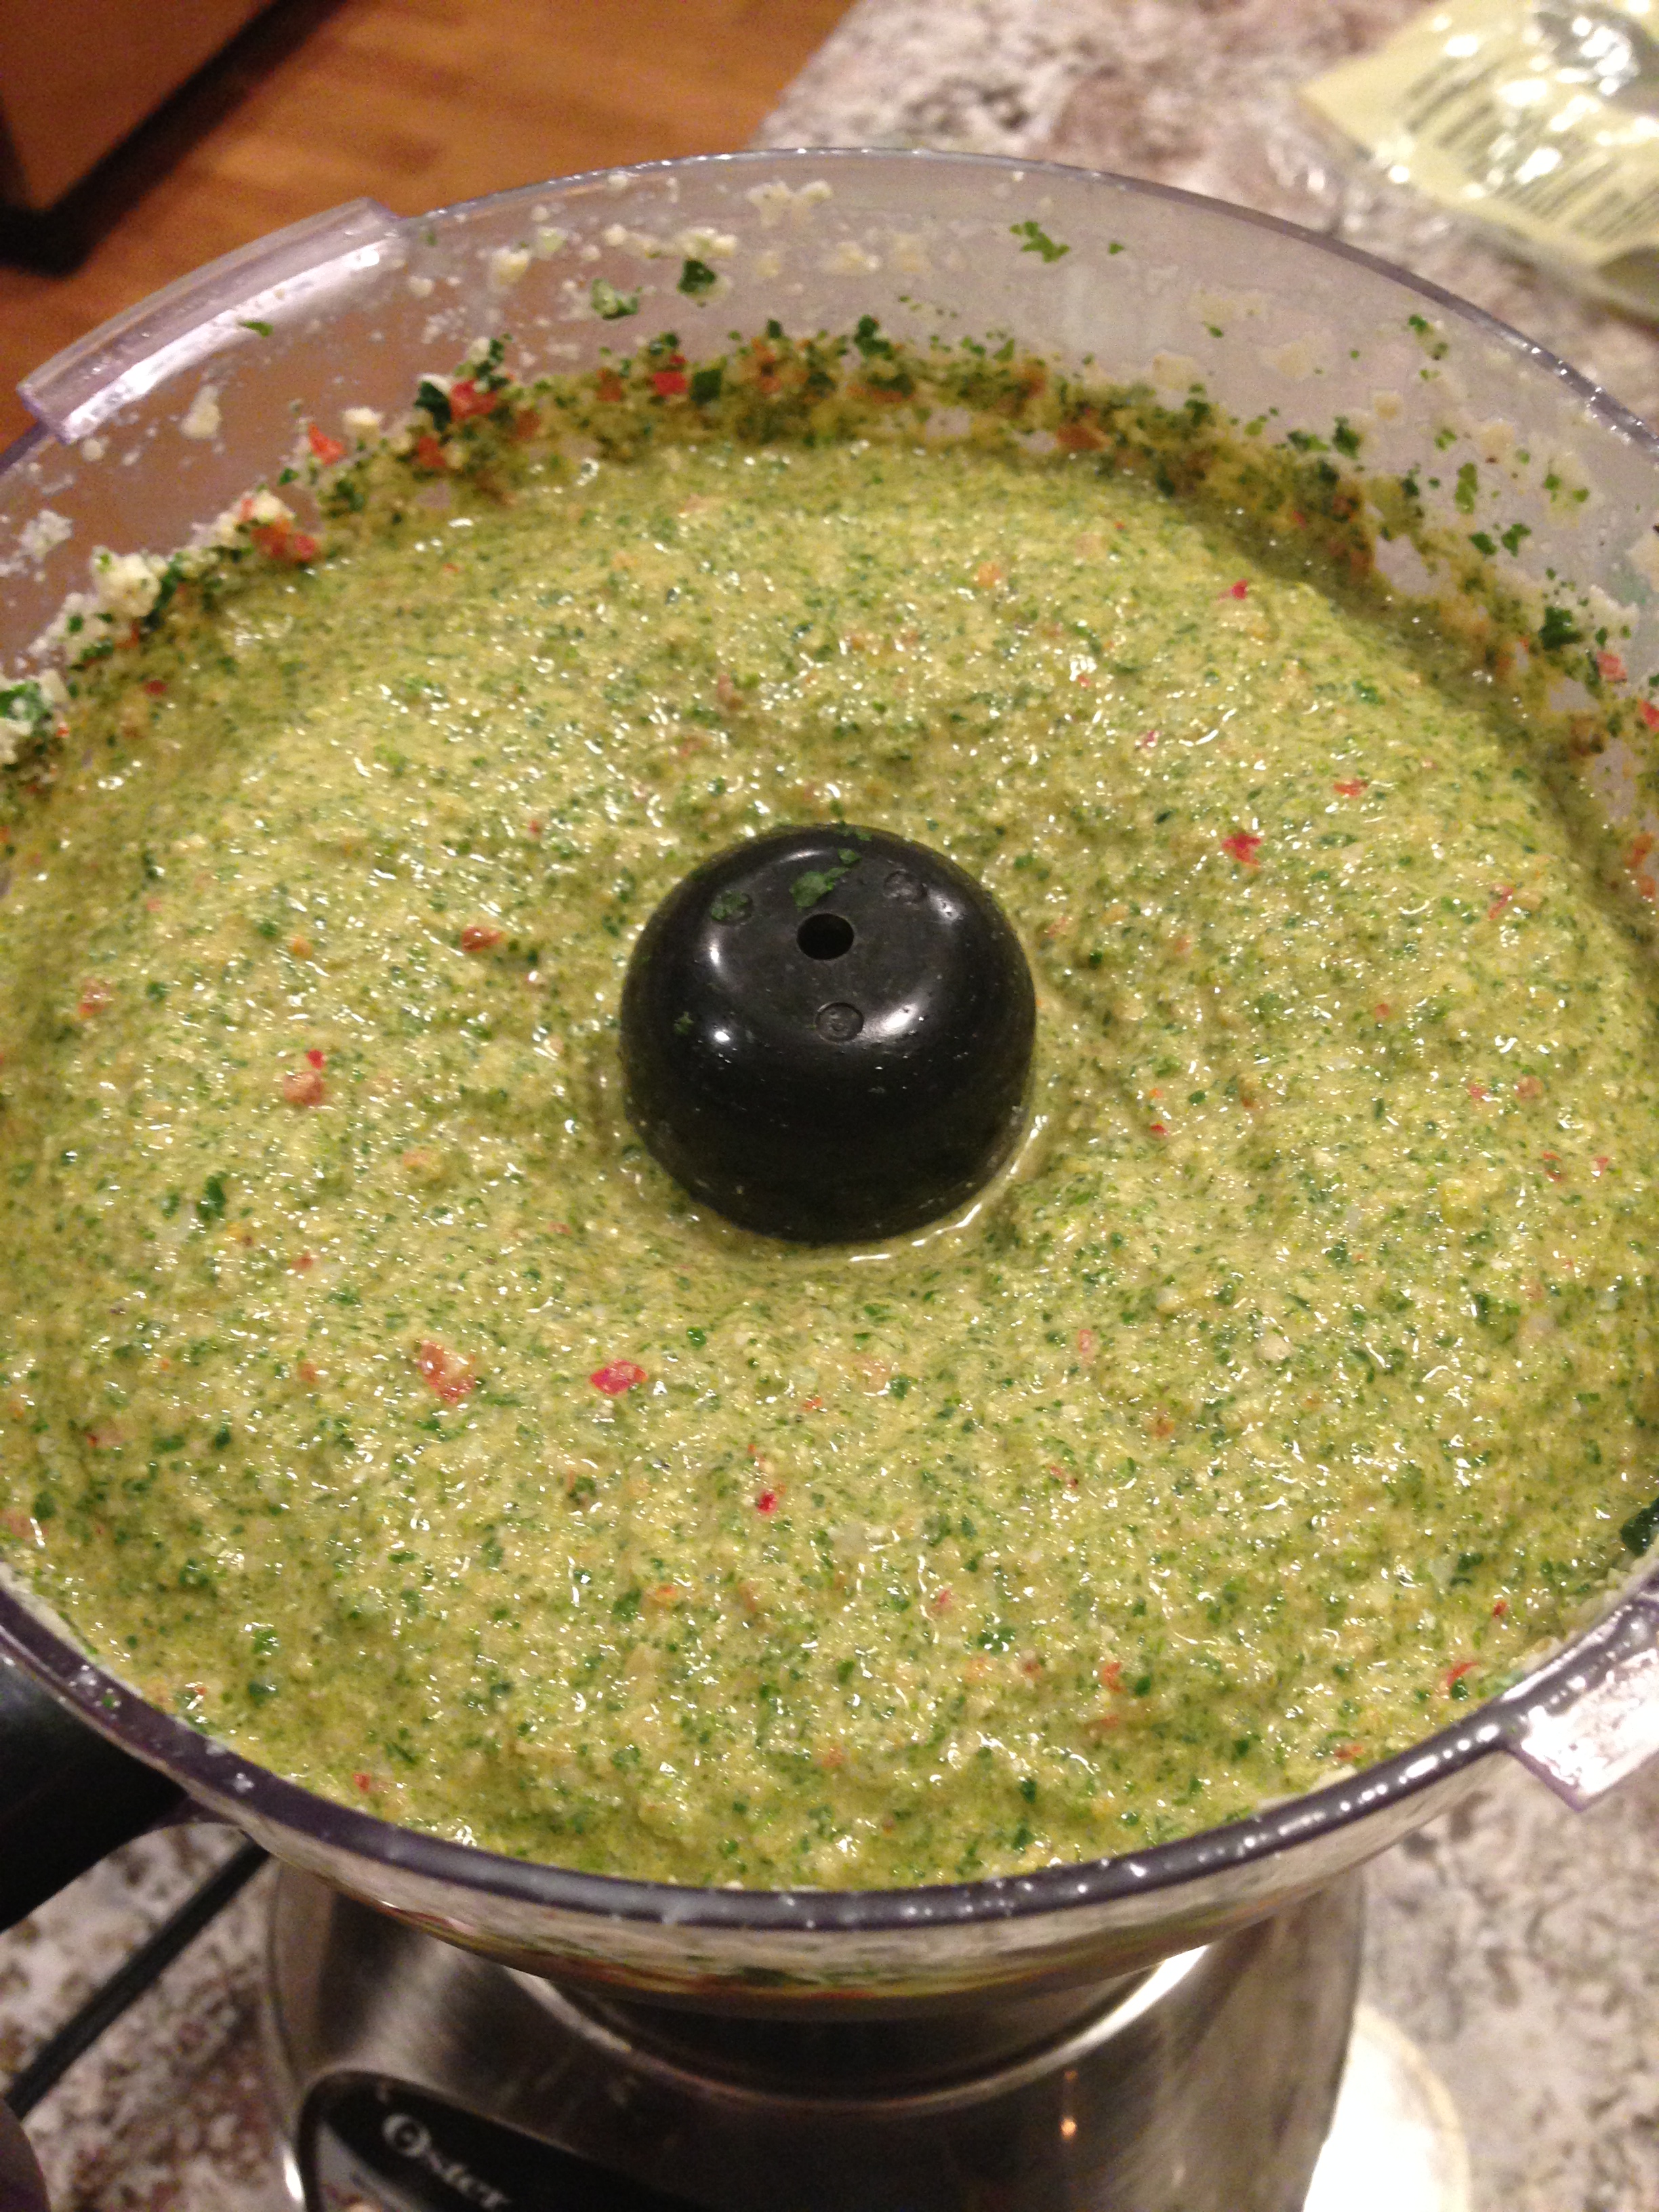
8. Add coconut milk and simmer for 10 minutes before pureeing.  I used an immersion blender, but if you don’t have one you will have to transfer to a regular blender to puree in batches.

2013-11-24 18.24.21

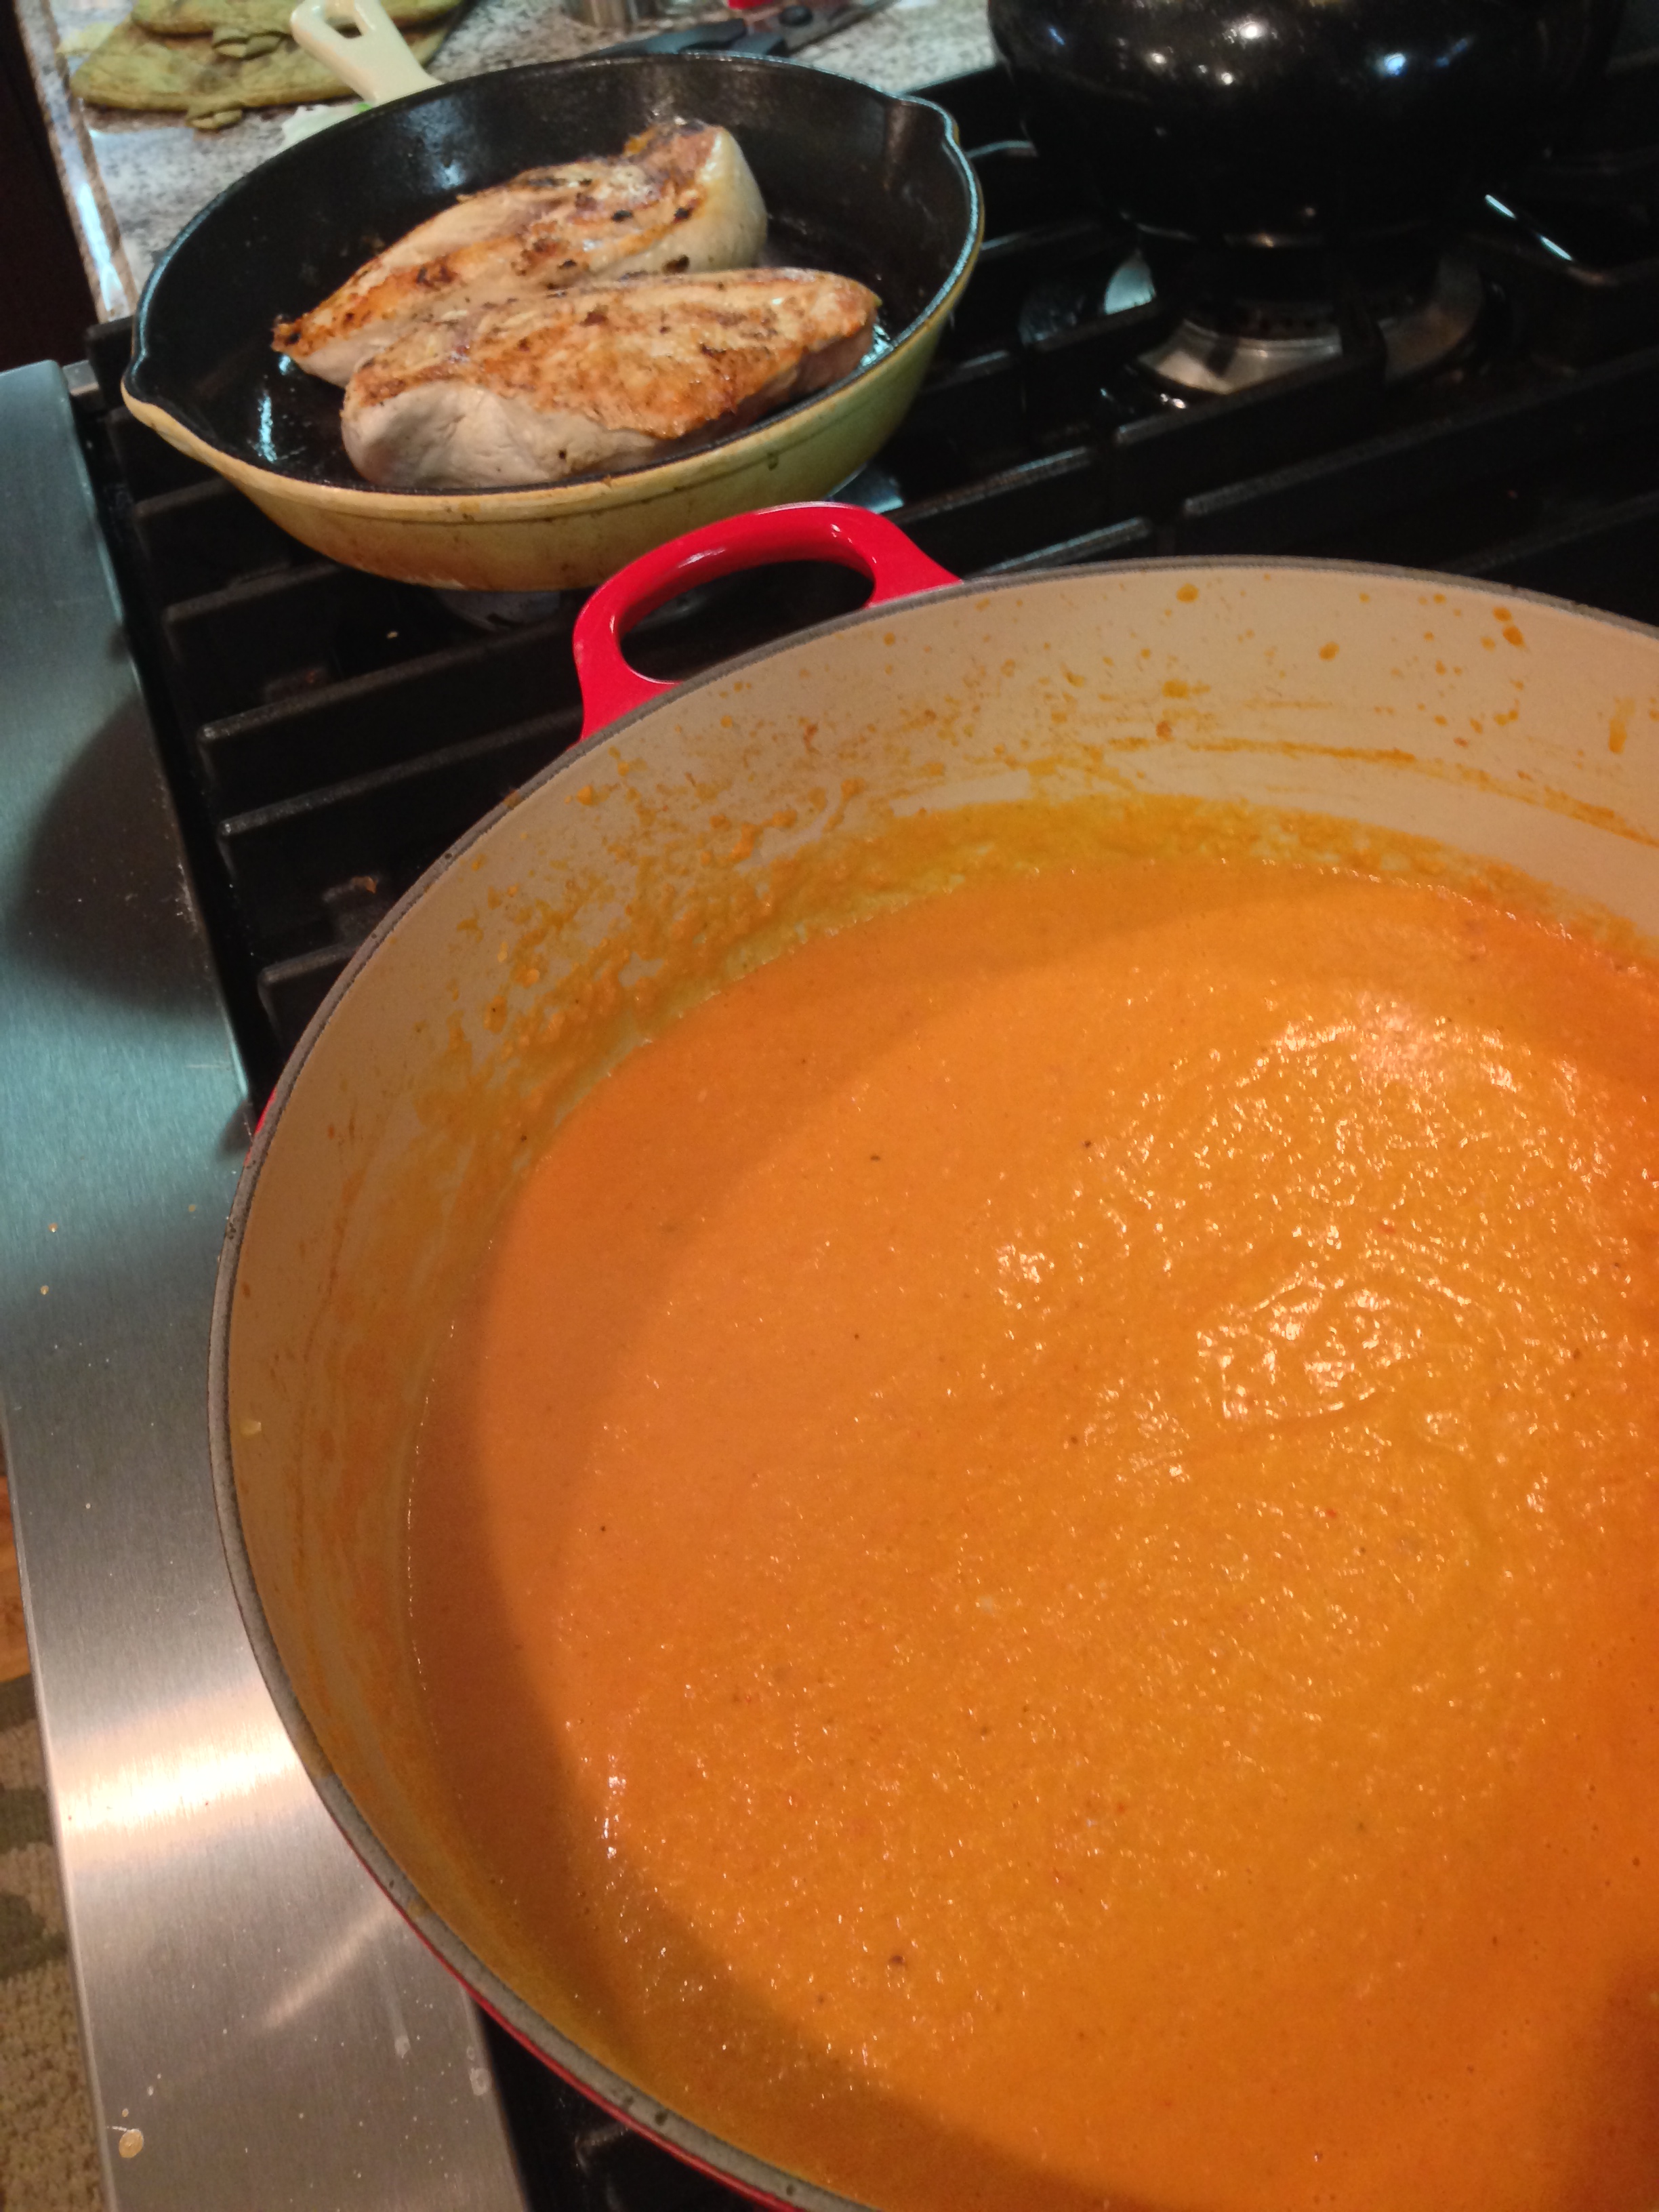
9. Nestle browned chicken into sauce and simmer on low for 15 minutes to finish cooking.

10. Serve over rice or spaghetti squash as pictured above.

Enjoy!

Spicy Chicken and Orzo Soup (crock pot)

2013-11-17 18.42.05

With my husband sick last week I wanted to make a good but easy chicken noodle soup.  Using a whole chicken, I broke it down and cooked it all day in the slow cooker to develop a spicy homemade broth.  Adding orzo noodles at the end you can finish the meal with little effort.  The hardest part of this dish was breaking down the raw chicken, very different from carving a cooked bird.  I had never really done this before, but I have read about it in my cooking magazines.  Don’t let them fool you, it is a bit of a process.  For those of you who don’t like to handle raw chicken…this is not for you.  I unfortunately don’t have pictures of the process as I didn’t want to get raw chicken hands on my phone.

Here is a link to a brief tutorial.  http://www.marthastewart.com/967789/how-cook#973692

Now I cut mine a little differently because I didn’t watch the tutorial first, rather went from memory.  Using kitchen shears I cut the bird in half through the spine and finished separating right from left by then splitting the breasts.  With the two equal halves I cut off the legs and wings.

If you don’t want to deal with bones you can use boneless and skinless chicken breasts, but I’m not sure you will develop the same flavor in the broth without the bones and skin.

I decided to use the orzo noodles for a smoother consistency with the large pieces of chicken, but you can use a traditional egg noodle or whatever noodle you want.  The fun part of cooking with orzo is that on day two the noodles will soak up almost all of the broth making a thick casserole consistency for the leftovers.

The best part about this meal is that it is very cheap to make a large quantity of food.  Whole chickens are inexpensive compared to buying the pieces separately.  I paid $5 for the whole chicken and about $3-4 for the rest of the ingredients (except spices that I had on hand).  After we had this for dinner I put the rest into mason jars for lunch, it made enough for 2 of us for the entire week.  Less processed and way less sodium than the canned stuff!

2013-11-17 19.16.09

Ingredients:

1 whole chicken (3-4 pounds), broken down into pieces.
1 large onion, diced
6 large carrots, peeled and diced
6 stalks of celery, diced
4-5 cloves of garlic, minced
1 dried chili pepper (Optional for heat)
4-5 sprigs of thyme, stems removed
1 bay leaf
1 lb orzo noodles, uncooked.
water
salt and pepper to taste (be generous, at least 1-2 tsp of salt and pepper each)

Directions:

1. Break down your chicken as instructed above.

2. Layer the crock pot with onions, celery, carrots and top with chicken.

3. Season with salt and pepper generously, add garlic, thyme, chili pepper and bay leaf.

2013-11-17 11.27.17

4. Fill the crock pot with cold water.  Cook on high for 2 hours then cook on low for 4 hours.

5. At least 30 minutes before serving add orzo noodles and stir gently.

2013-11-17 18.39.18

6. To serve ladle out noodles and vegetables with a whole piece of chicken per person.  The chicken will literally fall off the bone in your bowl, so you can grab end and it will come out clean with little effort.

2013-11-17 18.46.54

7. For storage remove the rest of the pieces of chicken and separate meat from bones, stir to mix well (you can do this immediately if you don’t want to serve the chicken pieces whole).

Enjoy!


Taco Seasoning

2013-11-05 19.51.13

The first time I made my own taco seasoning I made it because I was in a pinch and didn’t have time to go pick up a packet at the store.  I always used to purchase the pre-made packets thinking they were cheap and easy, but there is something so much better about making the seasoning yourself.  Plus you can adjust measurements based on your personal tastes.  I’m not exactly sure where I got this recipe, but it is flavorful and spicy and perfect.  I have used this with chicken, pork, and ground beef.

2013-11-05 19.18.26

Taco Seasoning Ingredients: 

1 Tbsp Chili Powder
1/4 tsp Garlic Powder
1/4 tsp Onion Powder
1/4 tsp Crushed Red Pepper
1/4 tsp Dried Oregano
1/2 tsp paprika
1 1/2 tsp Ground Cumin
1 tsp Salt
1 tsp Pepper

Directions:

Add seasoning ingredients together, store in airtight container to use as needed.  This amount will generally be enough for 1 lb of cooked meat and vegetables.

Tonight I sliced pork thin and sauteed with peppers and onions until cooked through.  Once mixed I added enough taco seasoning to coat.  Of course this is wonderful in a taco or burrito shell with conventional ingredients, but tonight I had it on a salad for a healthy and filling dinner!

2013-11-05 19.58.00

Spicy Pork

2013-11-19 19.35.53

I recently saw a recipe with a sriracha sauce drizzled on top of salmon, and it got my wheels turning.  Tonight for dinner I made some quick marinated boneless pork chops and topped it with a sriracha drizzle to spice it up.  AMAZING!  I imagine this would be good with chicken, beef, shrimp, or even salmon.  I served this with a side of garlic broccoli, but it would also be good over a bed of rice as well.  I will definitely make this again, I think it would be great as an appetizer with the meat skewered and sauce on the side to dip.

Sriracha drizzle Ingredients:

3 Tbsp of mayo
1 Tbsp sriracha (more or less to taste)
1 1/2 tsp of agave

2013-11-19 19.04.59

Marinade:

1/4 cup of soy sauce
1 tsp red pepper flakes
2 tsp garlic powder
1 tsp ginger powder

2013-11-19 19.24.41

Directions:

1. 30-60 minutes before you want to cook dinner, get your marinade ready.  Combine marinade ingredients in a ziplock bag and shake to combine, add 2-4 boneless pork chops to bag and allow to marinate for at least 30-60 minutes.  You can marinate the meat longer, but I was short on time and it ended up being the perfect match for the sriracha drizzle after just 30 minutes.

2. Make your sriracha drizzle by combining sriracha, mayo, and agave.

3. In a medium-hot skillet heat a generous amount of olive oil.  Cook marinated pork chops ~4 minutes on each side until cooked through.

4. Remove from heat and top with sriracha drizzle.

Enjoy!

Whole Sage Chicken and Stock (slow cooker)

2013-11-11 18.28.09

Starting with a small roaster chicken, an easy weeknight meal can be made in the slow cooker while you are away at work.  I found this recipe online a few years ago, so easy and inexpensive to make.  The best part is that this chicken is super moist and the flavors can be unique based on the spices you want to use.  I used dried sage, onion, and garlic for tonight’s chicken.  I am including two options for stock with this post as well.  The quick stock is nice but unnecessary for basting during cooking, the chicken will be delicious if you leave it alone all day.  I used this quick stock to make a butternut squash soup to have as a side to the chicken, yum!  If you have the time and patience, you can make a true slow cooked stock in the slow cooker after you eat the chicken.

Ingredients:

– 1 small roasting chicken 4-6 lbs
– 4 cloves of garlic, sliced thin
-1 medium yellow onion, half sliced in rings and half diced.
– 2 Tbsp of dried sage
– salt and pepper to taste

Quick Stock:

– chicken neck and organs (that are usually neatly cleaned and packed in chicken).
-1/2 onion, diced
-2-3 cloves of garlic, sliced
-1 bay leaf
– 1 tsp dried sage
-1 tsp ground pepper
-1 tsp salt (more to taste)
-4 cups of water

2013-11-11 13.09.23

Directions:

1. Line bottom of crock pot with sliced onion and 1/2 of the sliced garlic.

2. Remove organs and neck from chicken (reserve for stock), rinse with water and pat dry.

3. Season inside of chicken with salt, pepper, and 1/2 the sage.  Fill with diced onions and 1/3 of garlic.

4. Place chicken breast side up on top of onion bed.  Season with salt, pepper, remaining sage and garlic.

5. Cover and cook on low for 6-8 hours or until fully cooked.  (Optional if home while cooking) Baste chicken with a small amount (1/8 cup) of quick broth after 1 hour.  Then baste every hour after with juice on bottom of crock pot.

6. Carefully remove chicken when fully cooked from crock pot and carve.

Quick Broth:

1. Place reserved chicken neck and organs in medium sauce pan.

2. Add garlic, onions, seasonings, and water.

3. Bring to a boil, reduce heat to simmer for at least 45 minutes, up to 2 hours if able.

2013-11-11 13.15.33

Slow cooker Broth:

If you have the ability, after eating the chicken reserve the bones and return to crock pot with residual juices from cooking and sliced onions on bottom of pot.  Fill crock pot with water to cover bones and cook on low for 8 hours.

Strain and store in refrigerator until ready to use for up to 3 days.

Enjoy!

Hot Spiced Cider

2013-11-11 15.07.25

The first fall snow has fallen and the cold weather appears to be here to stay.  On these cold nights a glass of hot apple cider is the perfect beverage to keep you cozy and warm.  Add some dark rum and you have a real treat on your hands.  I have made this recipe on the stove top letting it simmer at least 30 minutes, or in the crock pot on low for a few hours.  I find that the cider turns out better if you start with a good quality and fresh apple cider.  The spices can be expensive to purchase, but the jars will typically last you for several rounds of cider.

Ingredients:

2 quarts apple cider
2 cinnamon sticks
5 whole allspice berries
10 whole cloves
2 anise stars
1 orange thinly sliced
1/2 Tbsp vanilla extract
Dark Rum

2013-11-11 14.28.37

Directions:

1. Combine all ingredients in saucepan and bring to a boil.  Simmer for at least 30 minutes on low.  If you want to make this in the crock pot, place all ingredients in the crock pot and place on low for 4 hours or high for 2 hours.

2. Ladle out of pot being careful to not spoon the loose spices into mugs.

3. Add 1 shot of dark rum if desired and garnish with cinnamon stick.

Enjoy!

Roasted Sweet Momma Squash

2013-10-27 19.52.56

Sometimes a side calls for a flair of sweet instead of savory.  Today I made a marinated pork tenderloin and decided it was just the dish for a little touch of sweetness.  I found an adorable squash at the farmers market last month, and as the season goes on I have decided to remove it from the decoration basket to serve for dinner.  It is called a sweet momma squash, looks like a larger and more plump acorn squash…unfortunately I did not take a picture before cutting it.  It tastes similar to acorn squash and has the same texture qualities.

Ingredients:

1 sweet momma squash (or acorn squash)
2 Tbsp  brown sugar
1 Tbsp melted butter
1 Tbsp coconut milk

2013-10-27 19.22.44

Directions:

1. Cut squash in half and remove seeds.  Slice into wedges 1-2 inches thick.

2. Spray lightly with olive oil and roast for 10 minutes in the oven at 400 F.

3. Remove from oven and coat with mixture of brown sugar, melted butter, and coconut milk on both cut sides.  Return to oven and roast for another 10-15 minutes until tender.

2013-10-27 19.52.56


The skins of the squash got really tender so I ate the whole thing.  If the skins don’t get soft enough or it weirds you out too much, just go for the fleshy center .

Enjoy!

Teriyaki Marinated Pork Tenderloin

2013-10-27 19.57.39

Making your own marinade is a great way to know exactly what you are eating.  This is an easy recipe that brings a sweet teriyaki flavor to a nice cut of meat.  I am sure there are different proportions that can be used and other ingredients that make a more teriyaki worthy marinade, but this combination tasted wonderful and cooked well.  Add a vegetable side or two and you have a full meal.

Ingredients:

2 lbs of pork tenderloin
1/2 cup soy sauce
1/4 cup of red wine vinegar
1/2 cup diced onions
2 ” slice of ginger, minced
5 cloves of garlic, minced
1 tsp cracked pepper
1 tsp red pepper flakes
1/2 lemon, juice
1/2 cup water
1 tsp sugar or agave nectar
3 tbsp oil (sesame oil if you have it)

2013-10-27 18.23.52

Directions:

1.  Mix together all ingredients for marinade into a large ziplock bag.  Add pork tenderloin and allow to marinade in the refrigerator for at least 6-12 hours.  If you are able, shake the bag to re-mix several times while marinating.

2. After the pork has had the opportunity to marinade, remove from fridge at least 30 minutes before cooking.

3.  Arrange in small baking pan 2-3 inches deep with a small amount of marinade.  Bake at 350 for 1 hour, or until internal temperature reads 145 degrees.  Allow to rest at least 10 minutes before cutting to serve.

2013-10-27 19.54.16Enjoy!


Prosciutto Panini

2013-10-26 14.01.53

If you are looking for a hearty weekend lunch or a weeknight dinner that can be varied according to individual tastes, a sandwich is a pretty good place to start.  Making a Panini is an easy way to spice up the meal, especially in cold weather with a side of soup.  To make the Panini today I started with small loaves of half-baked ciabatta bread from Trader Joe’s.  A hearty bread such as ciabatta or sourdough holds up nicely to the heat you will be adding to cook the panini and allows for a lot of ingredients stuffed inside.  A little trick to add flavor and a little more crunch is to toast the inside of the sandwich first.  Today I really went wild toasting the bread in a cast iron skillet that had a thin layer of bacon grease and roasted garlic…delicious.

Like I said you can really make any combination you want, I will share what I used today as it was amazing!  This is enough for 4 small sandwiches.

2013-10-26 13.35.08

Ingredients:

4 small loaves of ciabatta bread, fully baked.
3-6 Tbsp of oil of choice (I used bacon grease)
2-3 cloves of roasted garlic
8-10 slices of fresh shaved Prosciutto
4 Tbsp of light spinach and artichoke dip (see previous post)
fresh shaved parmesan cheese
4 thin slices of fresh mozzarella
1/2 avocado, sliced thin
1 handful of arugula
1 small zucchini thinly sliced, sauteed until cooked adente.

2013-10-26 13.55.31

Directions:

1. Prepare your bread first: Cut loaves in half.  Heat heavy skillet over medium heat to warm bacon grease (or oil of choice).  Add thinly sliced roasted garlic to hot bacon grease, stirring for about 1 minute.  Place sliced bread in skillet cut side down to brown in bacon grease, when you remove bread try to keep the garlic slices on the bread for extra flavor.

2. Prepare your sandwich by smearing spinach and artichoke dip inside top half of bread.  Place a slice of mozzarella cheese on bottom side of bread, layer with zucchini, followed by prosciutto, avocado, a few pieces of arugula, fresh shaved parmesan (to make this a breakfast sandwich we added thinly sliced hardboiled eggs to a few as well).

3. In your heavy skillet on medium-low heat place the sandwich in the pan.  If you have a panini press, use it to smoosh the sandwich gently.  Flip over after a few minutes when bottom is browned and cheese is starting to melt.

2013-10-26 13.52.21

A few secrets to a good panini:

-Place cheese in sandwich twice, once on the bottom and once on the top of your pile-up, this will keep the panini together better once cooked.  You don’t have to use the same kind of cheese, I used mozzarella on the bottom and parmesan on the top.

-Slice all ingredients very thin so they can be layered smoothly to prevent them from slipping out when you take a bite or press the panini.

-Cook on lower heat for longer periods of time to allow center to get hot and cheese to melt.

-If you are using sliced bread (like a grilled cheese), butter the outside with a mixture of butter and mayonnaise (50/50 mix) to avoid burning while cooking.

-A classic combination that never fails: tomatoes, mozzarella, fresh basil, and a smear of pesto.

Enjoy!

Light Spinach and Artichoke Dip

2013-10-26 15.38.05

Last weekend I made a vegan spinach and artichoke dip from http://www.plantpoweredkitchen.com (great ideas on this site).  I really enjoyed the idea of pureeing cashews with almond milk to make a dairy-free creamy base for a dip or spread.  I took the recipe a step or two in a different direction to make a vegetable based dip (no longer vegan) with peppers, basil, and a little parmesan.   After a few trials I found a combination that is really good and very healthy.  Earlier this week I baked it with chicken over a bed of onions, not bad.  The real winner came today when I used the dip as a spread on a prosciutto panini (recipe to come), it was perfect. The spread alone is a simple snack to bring to a gathering or to put out on football Sunday.  Serve warm with veggies, pita chips or toasted bread.  If you are into the dairy-free thing, skip the cheese.

2013-10-24 18.27.28

Ingredients:

3/4 cup raw cashews
3/4 cup almond milk (more for consistency)
1/2 lemon, juice
2 cloves garlic
10 small fresh basil leaves
1/2 tsp salt
1/2 tsp dry mustard
1/2 tsp ground pepper
1/2 tsp red pepper flakes (add more if you like it spicy)
1/2 jalapeno, seeds removed
1 red bell pepper, sliced
1/2 lb frozen spinach (you can use fresh as well, try 1 cup packed)
12 oz artichoke hearts (frozen or canned-drained)
1/2 cup grated parmesan cheese

Directions:

1. Add cashews, almond milk, lemon juice, garlic, basil, salt, mustard, red pepper flakes, and jalapeno to food processor with “s” blade.  Process for 1-2 minutes until liquid.

2013-10-24 18.40.55

2. Add red pepper, spinach, and artichokes to food processor and blend until combined to desired consistency.  Add more almond milk as needed.  If you are planning to serve this as a warm dip, just pulse in the vegetables to leave larger pieces of artichoke and pepper.  If using as a spread then pulse to the consistency above.  Stir in the parmesan cheese.

3. Spread the mixture into a small baking dish to heat for serving at 400 for 20-25 minutes.

2013-10-26 15.18.55Enjoy!

Butternut Ham Soup

2013-10-20 18.17.17

After making a ham last weekend I had another ham bone to utilize in a dish.  Instead of making split pea soup or red beans and rice, I wanted to make a fall soup without beans involved.  It took a lot of research to find a recipe that did not involve beans in some way, and when I finally found a reasonable recipe (vegetable ham soup on Cooks.com) I make a few changes including incorporating a butternut squash I had sitting around.  I also made this soup in the crock pot instead of on the stovetop to get as much benefit of the ham bone as possible.

Ingredients:

-1-2 Tbsp of olive oil or butter
-1 large onion, chopped
-6 carrots, peeled and diced
-4 stalks of celery, chopped
-3 cloves of garlic, minced
-10 cups of chicken stock
-4-5 sprigs of thyme
-1 Tbsp chopped parsley
-1 bay leaf
-1 medium butternut squash, peeled and diced
-3 cups chopped ham
-1 meaty ham bone
-ground black pepper to taste

Directions:

1. Heat oil or butter in heavy pot over medium heat.  Cook onion, garlic, carrots, and celery for 10-15 minutes.

2013-10-20 11.55.58

2. Add squash, ham, and black pepper to vegetables.  Stir to warm.  Add chicken broth, parsley, thyme, bay leaf, and ham bone.

2013-10-20 12.06.44

3. When warm, put in crock pot on low for 4-6 hours.

4. Remove thyme sprigs, bay leaf, and ham bone before serving.

Enjoy!

Spaghetti Squash Turkey Bolognese

2013-10-18 19.05.06

My mission of reducing processed foods in our diet is reaching an all time high with spaghetti squash season.  This dish is easy, flavorful, and very healthy.  From what I have learned a bolognese is really just a meat based sauce, so you can substitute for any meat of choice if you don’t have ground turkey on hand.  This recipe started to develop for me after I read a recipe from Martha Stewart (we are totally friends 😉 ), then I added a few additions of my own…like more bacon…and wine…and mushrooms.  My husband really enjoyed this dish without me having to make regular pasta noodles, so I consider this a total success!

Ingredients:

-1 medium spaghetti squash
-1 pound of lean ground turkey
-5 slices of bacon
-1 Tbsp garlic and chili pepper infused olive oil
-1 large onion, diced
-3 stalks of celery, diced
-1 cup sliced shiitake mushrooms (any mushrooms of choice)
-4 cloves of garlic, sliced thin
-1 Tbsp fresh thyme
-1 tsp red pepper flakes
-1 tsp black pepper
-1/4 cup dry red wine
-1 15oz can of tomato sauce
-2 15oz cans of diced tomatoes

Directions:

1.  Cut spaghetti squash in half, remove seeds, spray with olive oil and season with pepper.  Bake in oven at 375 for 45 minutes.  When it is fully cooked it is easily scraped out with a spoon to make spaghetti-like strands.

2013-10-18 19.00.10

2.  While squash is cooking, in a large heavy sauce pan cook bacon over medium heat until cooked through, remove from pot to use later.

3. Add 1 Tbsp of infused olive oil to pan with bacon grease along with onions, celery, mushrooms, garlic, thyme, red pepper flakes and black pepper, cook for 10-15 minutes until soft.

4. Remove onion and mushroom mixture and put in bowl for later use.

2013-10-18 18.25.54

5. Brown turkey in pot, breaking to crumble.  When fully cooked drain grease and add onion and mushroom mixture and crumbled bacon back to pot.  Add red wine and simmer for 5 minutes before stirring in tomatoes and tomato sauce.

6.  Let simmer for 30 minutes to develop flavor.

2013-10-18 18.30.15

7. Serve over spaghetti squash, add parmesan cheese if desired.

Pine Cones

2013-10-13 13.50.18

On a recent trip up to Wisconsin I collected a large number of pine cones from the woods around the cottage.  Before bringing them inside the house a very important step to take is de-bugging the cones!  Pine cones are a nice home for little bugs that can then run wild in your home.  De-bugging your pine cones is easy and there are several ways to go about it.  I used a soaking method instead of baking them in the oven, I just imagined the gas oven catching the pine cones on fire and burning down the entire condo building…you’re welcome neighbors.

What you will need:

– 1 large bucket

– 2-3 gallons of warm water

– 1 cup of household ammonia (I’ve seen vinegar be used before, if you don’t want to use ammonia)

– Newspaper

– Large plastic bin to hold cones for drying

– Pine cones

2013-10-07 17.17.38

Directions:

1. Start by putting 1 cup of household ammonia into the large bucket and filling 1/2 way with at least 2 gallons of warm water.

2. Pull out needles and dirt as able before putting all the pine cones into the ammonia water, fill up as needed with warm water to cover the cones.

3. The cones will float, so make sure to mix up occasionally or use a heavy bucket on top to submerge cones as able.

2013-10-07 17.37.30

4. Allow the cones to soak for about an hour, then rinse well with water.

5. Next you want to lay the cones out in the large plastic bin lined with newspaper.  I brought the cones inside at this point to dry, otherwise I was afraid they would get new bugs in them while drying outside.

2013-10-07 18.50.11The cool thing about pine cones is that they close up when they are wet then open back up when they are dry.  So when you are picking pine cones don’t be afraid to grab the ones that aren’t open, they will open up once they are clean and dry.  I found a bunch of really little pine cones that I’m excited to use in a small centerpiece or two this winter.

Variations: 

-White Cones- you can soak in bleach water instead of ammonia water, you need to let them soak longer (like 8-10 hours) before rinsing.

– Shiney Cones- after de-bugging spraying with a clear polyurethane spray and let dry as recommended on spray can.

– Glitter Cones- after de-bugging you can decorate the cones with glue and glitter, a fun craft project for little kiddos!

Vegetarian Squash Boats

2013-10-08 21.46.35

On my way home from a Fall weekend with my girlfriends, I found what appeared to be the worlds largest zucchini at a farmer’s stand in Wisconsin .  When I went to cut into it I was surprised to find out it was not a zucchini, but some sort of squash as it was hard and had a pumpkin-ish smell.  I did some research and I think what I had was actually a squash called Mo Qua.  My game plan completely changed with this discovery, I decided to make a roasted stuffed squash instead of grilled zucchini rings.  Usually I stuff squash with meatballs, pretty much the only way to get my husband to eat acorn squash, but I didn’t have any ground meat on hand so I made this veggie mixture instead.  Turned out to be amazing, sliced and served with salmon to complete the meal.  This stuffing will work in any squash, usually I prefer butternut or acorn squash for stuffing.

Stuffing Ingredients:

– 1/2 onion, diced
– 1 green pepper, diced
– 1 clove garlic, minced
– 1 Tbsp fresh thyme, center stem removed
– 1 Tbsp fresh basil, roughly chopped
– 1 large tomato, diced
– 1/8 cup sliced kalamata olives
– 1/4 cup Parmesan cheese
– 1/4 cup bread crumbs
– 1/2 tsp red pepper flakes
– salt and pepper to taste

Directions:

1. On a baking sheet roast the squash of choice by cutting in half, removing seeds, spraying with olive oil, and seasoning with salt and pepper.  Roast in the oven at 350 for 40-60 minutes, until pierced easily with a fork.  For a harder squash (butternut or spaghetti) , poke it with a fork throughout and put in the microwave for 5-7 minutes to soften up enough to easily cut in half.

2013-10-08 20.55.32

2. Make stuffing by sauteing onion, pepper, garlic, red pepper flakes, thyme, salt and pepper in a skillet over medium-high heat with olive oil.  Saute for 10 minutes on medium heat before stirring in the diced tomatoes, olives, and fresh basil.  Stir and cook for 5 minutes before gently folding in the Parmesan cheese and bread crumbs.  Mixture should be soft and cohesive, if it is too wet add more bread and Parmesan, don’t over mix.

2013-10-08 20.55.40

3. When your squash are roasted remove from oven and carefully stuff with stuffing.  Return to oven and roast at 350 for 10 minutes or until stuffing looks a little browned.

2013-10-08 21.12.40Enjoy!

Pumpkin Crumble

2013-10-04 16.09.16

After getting rave reviews of the apple pie, I decided to make another baked good just in time for the weekend.  Traditionally I stay away from making baked goods, because I just eat them…very quickly.  I find if I don’t make a cake, I won’t eat a cake.  However, my in-laws are coming to town this weekend and I decided it would be good excuse to make something sweet to share while they are here.  This is a recipe I found online on a blog (www.damndelicious.net) that is really healthy, delicious, and relatively easy.  Instead of making 3 small mini loaves, I made one regular size loaf and 6 muffins with a batch.

Ingredients:

– 1 cup all-purpose flour
– 3/4 cup whole wheat flour
– 1/2 cup sugar
– 1/4 cup brown sugar, packed
– 1 1/2 tsp pumpkin pie spice- 1 tsp baking soda
– 1 tsp baking powder
– 1/4 tsp salt
– 1 cup pumpkin puree
– 1/3 cup coconut oil
– 1/4 cup unsalted butter, melted
– 1/4 cup applesauce
– 2 large eggs
– 1 tsp vanilla extract

Crumb topping ingredients:

– 1 1/4 cup all-purpose flour
– 1/2 cup brown sugar, packed
– 1/4 cup sugar- 1 tsp pumpkin pie spice
– 1/2 cup unsalted butter, melted

Directions:

1. Preheat oven to 350 degrees.  Coat bread pans with a thin layer of butter, then lightly flour so the bread doesn’t stick when removing from pan.  Do the same to muffin tin unless you are using cupcake papers.

2. Make crumb topping: Combine ingredients in a medium sized bowl and set aside.

3. Make cake mix.  Combine the dry ingredients together in a large bowl: flours, sugar, brown sugar, pumpkin pie spice, baking soda, baking powder, and salt in a large bowl.

4. In a small bowl whisk together the wet ingredients: pumpkin puree, coconut oil, butter, applesauce, eggs, and vanilla.

2013-10-04 14.26.26

5. Stir together the wet and dry cake ingredients gently, take care to not over mix.

6. Fill the cake pan and muffin tins just over halfway full with cake mix.  Sprinkle generously with the crumble topping, pushing gently into the batter.

7. Bake the muffins in the oven for 30 minutes and the cake loaves for 45-60 minutes.  the center will be spongy and a toothpick inserted should come out clean.

The apple sauce and coconut oil make you feel like you are eating a healthy snack and allow the cake to stay extremely moist.  All the moisture of the cake is counterbalanced by the crumbles on top.  These can get messy, try serving with a fork and plate so you don’t lose the yummy crumbles.  This can also be a good dessert served warm with vanilla ice cream.

Enjoy!